How to Write Your Own Transforms#
26 Minute Read
Summary#
In this tutorial, we will write our own custom transforms to illustrate the structure of parameterized transforms as described in the previous tutorial.
We will write one custom atomic transform
RandomColorErasingand one custom composing transformRandomSubsetApply.We will then visualize sample augmentations generated by these transforms along with the parameters corresponding to those augmentations.
A Quick Recap of the Atomic Transform Structure#
Recall that to define your own atomic transform, you can do the following–
Subclass from
AtomicTransform.Define the attributes
tx_modeandparam_count; you may choose to do so with your concrete definition of theset_param_countmethod for the latter.Define your concrete implementation of
get_raw_paramsmethod.Define your concrete implementation of
apply_transformmethod.Define your concrete implementation of
post_process_paramsmethod.Define your concrete implementation of
extract_paramsmethod.Define your concrete implementation of
pre_process_paramsmethod.Define your concrete implementation of
get_default_paramsmethod.(Optional) Define your concrete implementation of
__str__method.
RandomColorErasing: A Custom Atomic Transform#
Follow the notebook 002-001-RandomColorErasing.ipynb while going through the details below.
Let us write a transform
RandomColorErasingthat inputsPIL-images and erases a randomly selected rectangular region of the image by replacing it with a randomly sampled color.Since we want a well-defined and simple functionality, we implement it as an atomic transform. Thus, we subclass from
AtomicTransformto derive theRandomColorErasingclass.
The Initializer __init__#
The initializer of the class sets the transform mode
tx_modeand the default parameters modedefault_params_mode. The former is a requirement as per the transform structure and the latter is needed since this transform has multiple default parameter possibilities, as explained later on.The initializer sets the number of parameters of the transform
param_count, which is7. This is because we need to uniquely describe the rectangle to be erased and the fill-color for this erased region. The rectangle can be uniquely defined with4parameters; two parameters describing the coordinates of the location of the rectangle, which is defined as its top-left corner, and two more parameters describing its size, which comprises of its height and width. Next, the fill-color can be captured with3parameters for its(r, g, b)values. Thus, we need7parameters in total, which is why we haveparam_count = 7.
Getting Raw Parameters with get_raw_params#
We define our implementation of
get_raw_paramsas follows.The raw parameters are the
4parameters for the rectangle to be erasedi, j, h, w, The tuple(i, j)represents the top-left corner of the rectangle in height-first format. The tuple(h, w)represents the tuple of the height and width of this rectangle.We define a random color to be used for filling in the erased image, the
fill_color, as annp.ndarrayinstance of size[3, ]and of dtypenp.uint8.Thus, the raw parameters is the tuple
(i, j, h, w, fill_color), which is output by this method.
Applying the Transform with apply_transform#
We define the our implementation of
apply_transformin a straightfoward manner as follows.We select the rectangle slice of the image starting at pixel
(i, j)and of shape(h, w). This slice is replaced with the colorfill_color. We then return the augmented image to complete the implementation.
Standard Format Parameters with post_process_params#
Our implementation requires that final parameters to be output by the transform MUST be a tuple of scalars.
Thus, we define our implementation of
post_process_paramsas follows.We take the starting pixel
(i, j), rectangle size(h, w), and the fill colorfill_color = array([r, g, b]), and return the7-tuple of parameters(i, j, h, w, r, g, b).
Extracting Required Parameters with extract_params#
The scenario for this function is that we are given a tuple of scalar parameters and we want to extract the parameters that we need for the current transform. By design, these required parameters are going to be at the beginning of the parameters tuple.
Thus, we define our implementation of
extract_paramsas follows.We extract the first
self.param_countmany parameters as the required processed parameters and keep the rest of the parameters to the next transforms.Note that in almost all the cases, this is going to be the implementation of this
post_process_params.
Recovering Raw Parameters with pre_process_params#
Note that the extracted parameters are going to be post-processed versions of the corresponding raw parameters. Thus, we need to convert these back to obtain these raw parameters, which can then be used to apply the transform.
Thus, we define our implementation of
pre_process_paramsas follows.We keep the
i, j, h, wparameters as is and convert the last three scalar parametersr, g, binto anumpy.ndarrayinstance of size[3, ]and dtypenp.uint8to obtain the fill colorfill_color.We then return the tuple of the recovered raw parameters
(i, j, h, w, fill_color).
Defining Default Parameters with get_default_params#
This is a tricky method as we want to define the default parameters, which preserve the image as much as possible.
In case of this transform, we can indeed obtain an “identity transform”; we can define parameter settings such that the transformed image will be identical to the input one. In fact, we have more than one parameter settings that can preserve the identity of the image. Thus, we also choose to provide control over these identity parameters via the
DefaultParamsModeenum and thedefault_params_modeattribute.With this in consideration, we define our implementation of
get_default_paramsas follows.First, note that if
default_params_modeisDefaultParamsMode.UNIQUE, we can use the location of the rectangle to be erased as(i=0, j=0)and keep its height and width as(h=0, w=0). Here, the idea is that a rectangle at location(0, 0)and of shape(0, 0)is being erased, which means that we are NOT erasing anything. Further, we define thefill_colorto be(r=0, g=0, b=0)to fill in the erased rectangle. Thus, the processed default parameters fordefault_params_mode = DefaultParamsMode.UNIQUEare the tuple(0, 0, 0, 0, 0, 0, 0).Otherwise, we have
default_params_mode = DefaultParamsMode.RANDOMIZEDand we want to obtain randomized default parameters. We can indeed have randomized default parameters because a(0, 0)shaped rectangle at ANY location in the image will leave the image unchanged. Further, vacuously, this rectangle can be colored with ANY fill color and we will still get the same image back.Note that we can have some other ways in which we can obtain an identity transform too.
For instance, we can have any location for rectangle to be erased, any color to fill in this region, but exactly one of height and width to be 0.
This parameter setting is indeed possible to achieve an identity transform but for the sake of simplicity in this example, we will ignore these parameter settings!
Thus, in this remaining case, we sample any valid location
(sample_i, sample_j)in the input image for the rectangular region to be erased. We define the height and width of this rectangle to be(h=0, w=0). Finally, we sample any color(sample_r, sample_g, sample_b)to be used to fill in this rectangular region. And thus, the returned default parameters by this transform will be the sample–(sample_i, sample_j, 0, 0, sample_r, sample_g, sample_b).
And that’s it! We have written our own parameterized transform! Now, we will write a custom composing transform to illustrate its structure. As we will see, the structure for composing transforms is almost the same as that for atomic transforms but with minor changes.
A Quick Recap of the Composing Transform Structure#
Recall that to define your own composing transform, you can do the following–
Subclass from
ComposingTransform.Define the attributes
tx_modeandparam_count; you may choose to do so with your concrete definition of theset_param_countmethod for the latter.Define the core transform with the attribute
transforms.Define your concrete implementation of
get_raw_paramsmethod.Define your concrete implementation of
apply_cascade_transformmethod.Define your concrete implementation of
post_process_paramsmethod.Define your concrete implementation of
extract_paramsmethod.Define your concrete implementation of
pre_process_paramsmethod.Define your concrete implementation of
apply_consume_transformmethod.Define your concrete implementation of
get_default_paramsmethod.(Optional) Define your concrete implementation of
__str__method.
RandomSubsetApply: A Custom Composing Transform#
Follow the notebook 002-002-RandomSubsetApply.ipynb while going through the details below.
Let us write a transform
RandomSubsetApplythat wants to perform the following functionality. Given a sequence of transformst1, t2, ..., tN, it flips a coin for each transform and based on the outcome, decides to either apply that transform or skip applying that transform. As a concrete example, suppose we are given transformsRandomRotation,ColorJitter, andRandomAffine. We flip a coin thrice and observeH,T,H. Then, we applyRandomRotationto get partially augmented image, skipColorJitter, and finally applyRandomAffineon the partially augmented image to get the final augmentation.We name this transform so because effectively, we are taking a subset of all the transforms and applying in order!
Firstly, we observe that this transform inputs a variable number of other transforms and defines a composing behavior on top of their functionality. Thus, we subclass from
ComposingTransformto define ourRandomSubsetApplyclass.
The Initializer __init__#
Since we need to work with any number of core transforms, we set the attribute
transformsto hold the list of input core transforms.As seen before in the case of
RandomColorErasing, we set the transform modetx_modeattribute.Now, we need to set the
param_countattribute, which is interesting! For this, we first need to decide how we want to parameterize the augmentation strategy. In this example, we will go about it as follows. When a core transform is indeed chosen to be applied, we will take its augmentation parameters. However, when a transform is skipped, we will use its default parameters, which are intended to act as identity-preserving parameters by design.There can be several ways to parameterized the transform uniquely and we provide one such way here!
Thus, the total parameter count for our composing transform is simply going to be the sum of the parameter counts of all the core transforms. Towards this, we have a special helper function in
parameterized_transforms/utils.py, namedget_total_params_count. Thus, we set theparam_countattribute of the transform using it.In addition, we also set extra attributes
idx_limitsandnum_core_transformsas we will need them later on. The former attribute holds the indices where parameters of different core transforms begin and end and the latter attribute holds the total number of core transforms. For convenience, let us say that there areNcore transforms.
Getting Raw Parameters with get_raw_params#
We define our implementation of
get_raw_paramsas follows.The raw parameters of our transform are going to be
Ncoin flips, where thei-th coin flip decides whether to apply or skip the transform.We encode this using an
[N, ]shapednumpy.ndarraywith values0and1, representing the outputs of the coin tosses and return it as a tuple.
Applying the CASCADE Mode Transform with apply_cascade_transform#
Now, having access to the raw parameters, we easily define our implementation of
apply_cascade_transformas follows.For each transform
txin core transforms, we check if we want to use it or skip it based on the corresponding raw parameter. If we want to use the core transform, we ask the core transform to apply a random augmentation and collect the corresponding augmentation parameters. However, if we want to skip the core transform, we ask the core transform to get its default parameters, apply those parameters on the image to get the default-augmented image, and collect the default parameters.Here, the reason to apply the default augmentations is very subtle. It can help in the cases where the augmentation output by one transform might affect the augmentation parameters of the next transform in line. We then concatenate all the collected augmentation parameters together. Finally, we return the tuple of the augmented image and the combined parameters as output.
Here, we can find a subtle difference in the structure of composing transforms versus that of the atomic transforms. The atomic transforms only have one method
apply_transform, whereas composing transforms have two separate methods–apply_cascade_transformandapply_consume_transform. The reason for this will be apparent later on but in brief, this is required due to possibly different functionalities for the core transform based on the mode of the composing transform.Another subtle difference is the signature of these methods;
apply_transformonly returns anIMAGE_TYPEinstance, whereasapply_cascade_transformandapply_consume_transformreturn a tuple ofIMAGE_TYPEandPARAM_TYPE. The reason for this is that we want to have access to the augmentation parameters of the core transforms.
Standard Format Parameters with post_process_params#
Here, we define our implementation of
post_process_params.As the structure of composing transform shows, there is a subtle difference in the signatures of this method in the atomic and the composing transform templates. In composing transforms, this method inputs the image along with two groups of parameters– 1.
params, representing the local raw parameters of the composing transforms, and 2.aug_params, the augmentation parameters collected from the core transforms. The job of this method is to post-process both these groups of parameters and return their processed versions.In our case, by design, the local raw parameters are redundant; the augmentation parameters, along with the
idx_limitsattribute essentially encode all the information that we need to uniquely describe the parametrization.Thus, we simply ignore the
paramsand return the tuple(), aug_paramsas output!
Extracting Required Parameters with extract_params#
Again, as seen before, the scenario for this function is that we are given a tuple of scalar parameters and we want to extract the parameters that we need for the current composing transform. These required parameters are going to be at the beginning of the input parameters tuple.
Thus, we define our implementation of
extract_paramsexactly as done before.We extract the first
self.param_countmany parameters as the required processed parameters and keep the rest of the parameters to the next transforms.
Recovering Raw Parameters with pre_process_params#
This is another place where the composing transform structure differs subtly from the atomic transform structure. Obviously, we want to recover raw parameters from the extracted parameters but in this case, we want to recover the local raw parameters that would be needed by the transform to perform the task of applying CONSUME mode transform AS WELL AS the processed augmentation parameters to be supplied to the core transform to make it perform the task of applying its CONSUME mode transform. Thus, instead of returning a single parameter group, here we return a tuple of two parameter groups.
Thus, we define our implementation of
pre_process_paramsas follows.Since all the required information would be present in the augmentation params to be fed to the core transforms, we ignore the local raw parameter requirement and return the tuple of empty parameters (for the local raw parameters) and the input
paramsas they are (for augmentation parameters).
Applying the CONSUME Mode Transform with apply_consume_transform#
We define our implementation of the
apply_consume_transform, which is a separate method to be used to input the local raw parameters as well as augmentation parameters for the core transforms, and return the corresponding augmentation obtained with these parameters.Since local raw parameters are
()as explained above, we just use the augmentation parameters and chunk them using theidx_limitsattribute to recover the augmentation parameter of each of the core transforms in order.We then just apply these chunked augmentation parameters in order on the core transforms and get the required image.
For the sake of a safety check, we return the augmented image along with the remaining augmentation parameters.
If everything is working correctly, the remaining augmentation parameters MUST be empty, i.e.,
()!
Defining Default Parameters with get_default_params#
We define our implementation of the
get_default_params, which returns the default parameters of this composing transform.Now, note that this transform can preserve identity by just using the default parameters of each of the core transforms; note that which transform were actually used and which were skipped becomes irrelevant in this parametrization scheme!
Thus, we simply obtain the default parameters of each of the core transforms, apply these default parameters on the image to obtain its default-augmented version, and return the combined default augmentation parameters!
As seen before, the application of default parameters is a subtle but important detail; it might be possible that application of a transform might affect the default parameters for some transform next-in-line.
And voilà! We have written our own custom composing transform!
Visualizing Augmentations with RandomColorErasing and RandomSubsetApply#
Follow the notebook 002-003-Visualizations.ipynb while going through the details below.
Now, having implemented the transforms
RandomColorErasingandRandomSubsetApply, we visualize the augmentations generated by them. This visualization is only for the sake of verification of the efficacy of the transforms and we will explore the power and capabilities of the parameterized transforms in a subsequent tutorial. In the notebook for this section, we provide a function namedshow_imageto quickly visualize different images.We will visualize the augmentations with two beautiful images– Curly, the cat, and Pep, the dog. These images are displayed below–
Curly, the Cat |
Pep, the Dog |
|---|---|
|
|


Visualizing RandomColorErasing#
We will visualize the augmentations generated by the
RandomColorErasingwith Curly, the cat.Let us create an instace
tx_RCEof ourRandomColorErasingtransform and print it to see the output of our custom__str__method.Next, we generate multiple samples from our transform. Observe that the augmentations consist of a rectangular region of the image being erased and replaced by a random color, which is the desired behavior of the transform. Also, observe the parameters of this augmentation and check whether the location and size of the erased rectangle as well as the color used for filling in the erased rectangle are consistent and make sense!
Here are some of the augmentations generated by our transform–
|
|
|
|
|
|
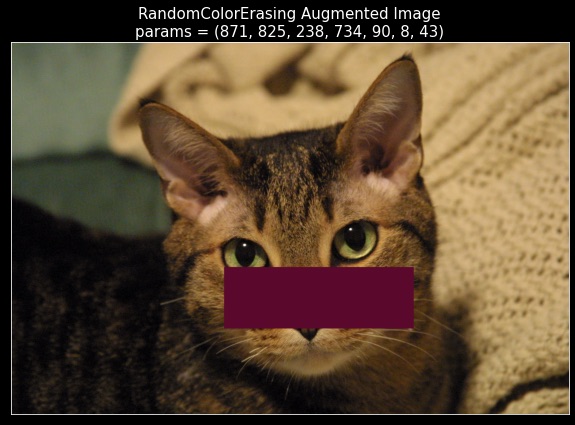
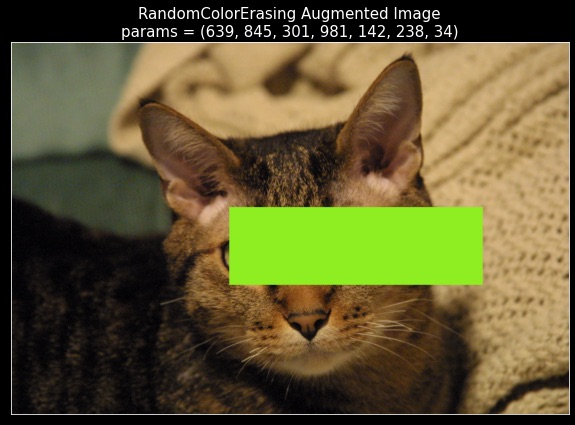
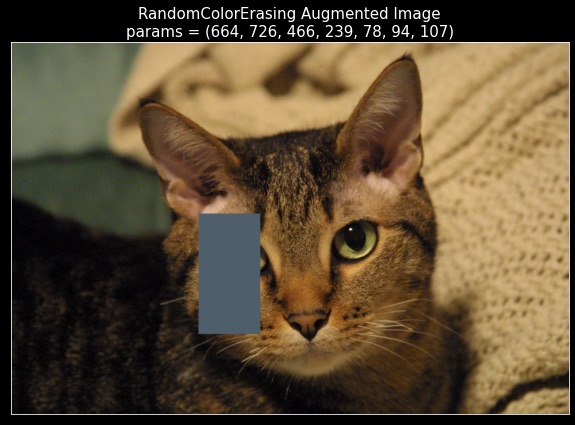
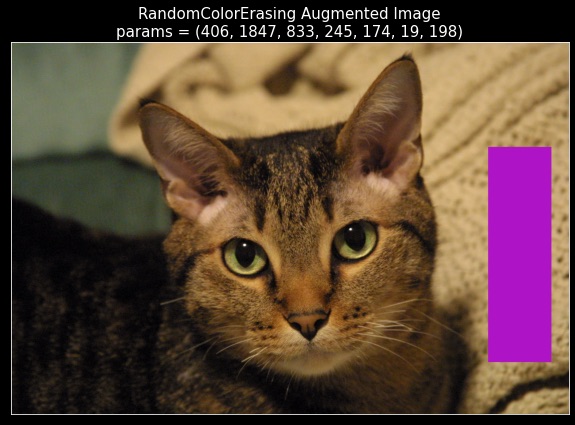

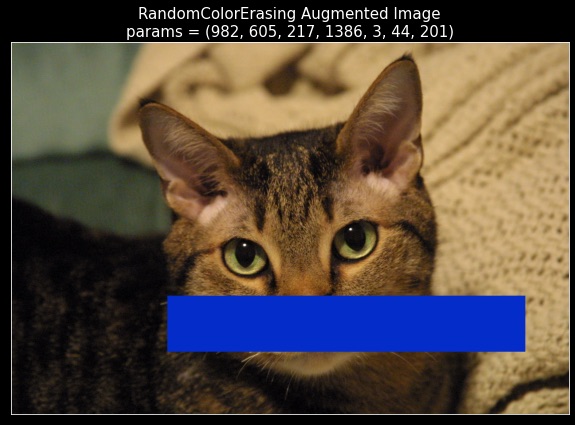
Note that in some cases, the erased rectangle can be difficult to spot due to the size or fill-in color of the erased rectangle.
Next, we also perform two sanity checks–
Let us say that for the original image of Curly, we pass it through the CASCADE mode of
tx_RCEand obtain an augmentationaugand corresponding parametersparams. Now, by definition, if we were to take the original image of Curly along with these parametersparams, and pass it through the CONSUME mode of thetx_RCEtransform, we ought to get the same augmented imageaugback. We can observe that this is indeed the case!Note that the default parameters for
RandomColorErasingtransform indeed preserve the image and act as identity transform parameters. Thus, if we were to pass the original image of Curly, along with the default parameters, and pass these through the CONSUME mode of thetx_RCEtransform, we ought to get the original image back. We can also observe that this too is indeed true!
So, we can see that our custom atomic transform
RandomColorErasingbehaves as expected!
Visualizing RandomSubsetApply#
We will visualize the augmentations generated by the
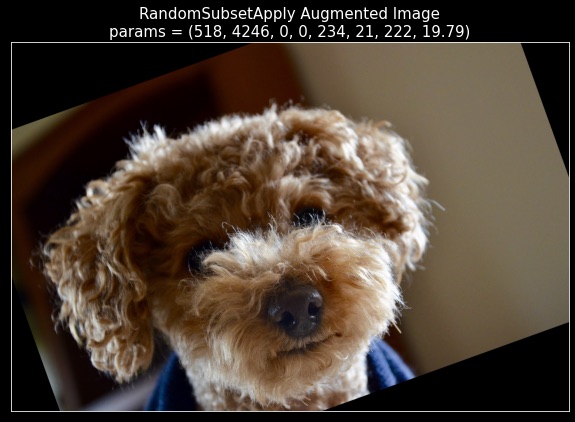
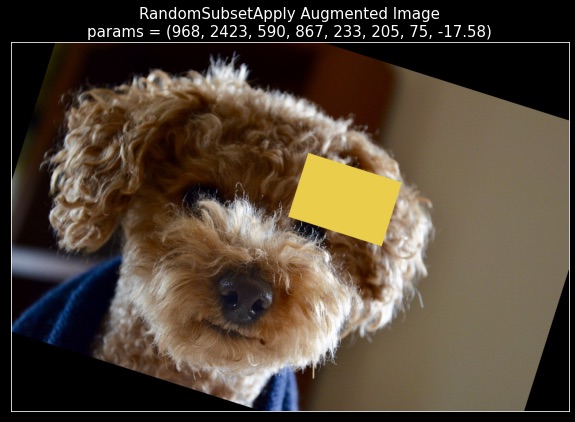
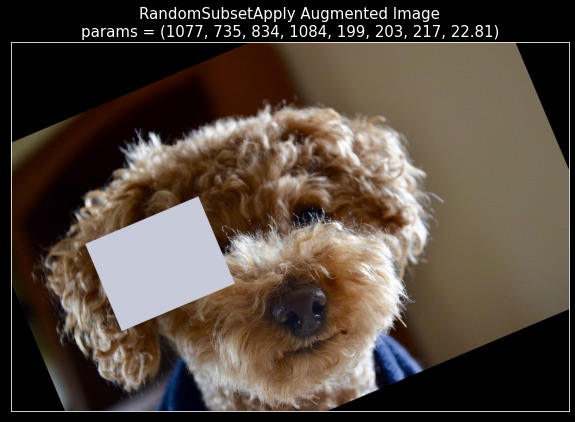
RandomColorErasingwith Pep, the dog.Note that
RandomSubsetApplyis a composing transform and requires one or more core transform(s) in order to function properly. Given these core transforms, this composing transform will select a subset of the core transforms and apply them IN ORDER (i.e., in the order in which they appear in the core transforms).Thus, we will use the following two transforms as the core transforms for
RandomSubsetApply– one instance of our ownRandomColorErasingtransform and one instance ofRandomRotationtransform provided by our package.This
RandomRotationtransform inputs an image and rotates it by a random angle sampled from the range provided to it.
So, let us create an instace
tx_RSAof ourRandomSubsetApplytransform as described above containing the following core transforms in the given order–RandomColorErasing(param_count=7, tx_mode=TransformMode.CASCADE, default_params_mode=DefaultParamsMode.RANDOMIZED), which erases a randomly chosen rectangle from the image and replaces it with a randomly chosen fill-in color, andRandomRotation(degrees=[-30.0, 30.0], interpolation=InterpolationMode.NEAREST, expand=False, center=None, fill=0, param_count=1, tx_mode=TransformMode.CASCADE), which rotates the input image by a randomly sampled angle (in degrees) from the range[-30.0, 30.0]. Here, we see the utility of defining the custom implementation of__str__; it allows for a clean, readable description of the transform, and may also help in debugging issues with complex transforms.
Since our composing transform flips a (fair) coin per core transform and choses to apply it or skip, it should result in the following behavior–
With probability
1/4, it skips both the transforms and keeps the image as it is.With probability
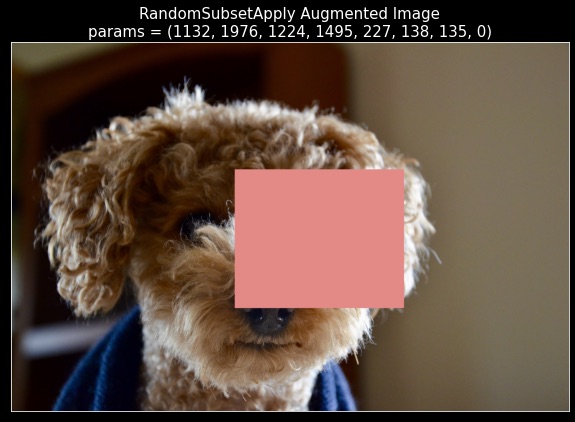
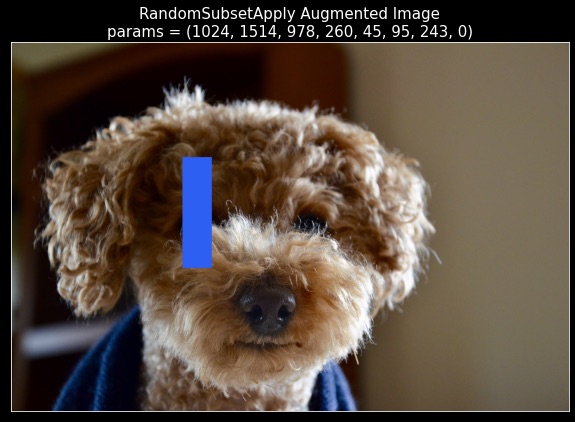
1/4, it ONLY applies theRandomColorErasingtransform, thereby erasing a randomly chosen rectangle from the image and filling it in with a randomly chosen color, and skips theRandomRotationtransform.With probability
1/4, it skips theRandomColorErasingtransform and applies ONLY theRandomRotationtransform, which rotates the original image by a randomly chosen angle (in degrees) from the range[-30.0, 30.0].With probability
1/4, it first applies theRandomColorErasingto erase a randomly chosen rectangular region from the image and to fill it in with a randomly chosen color. It then applies theRandomRotationtransform to rotate this partially augmented image by a randomly chosen angle (in degrees) from the range[-30.0, 30.0].
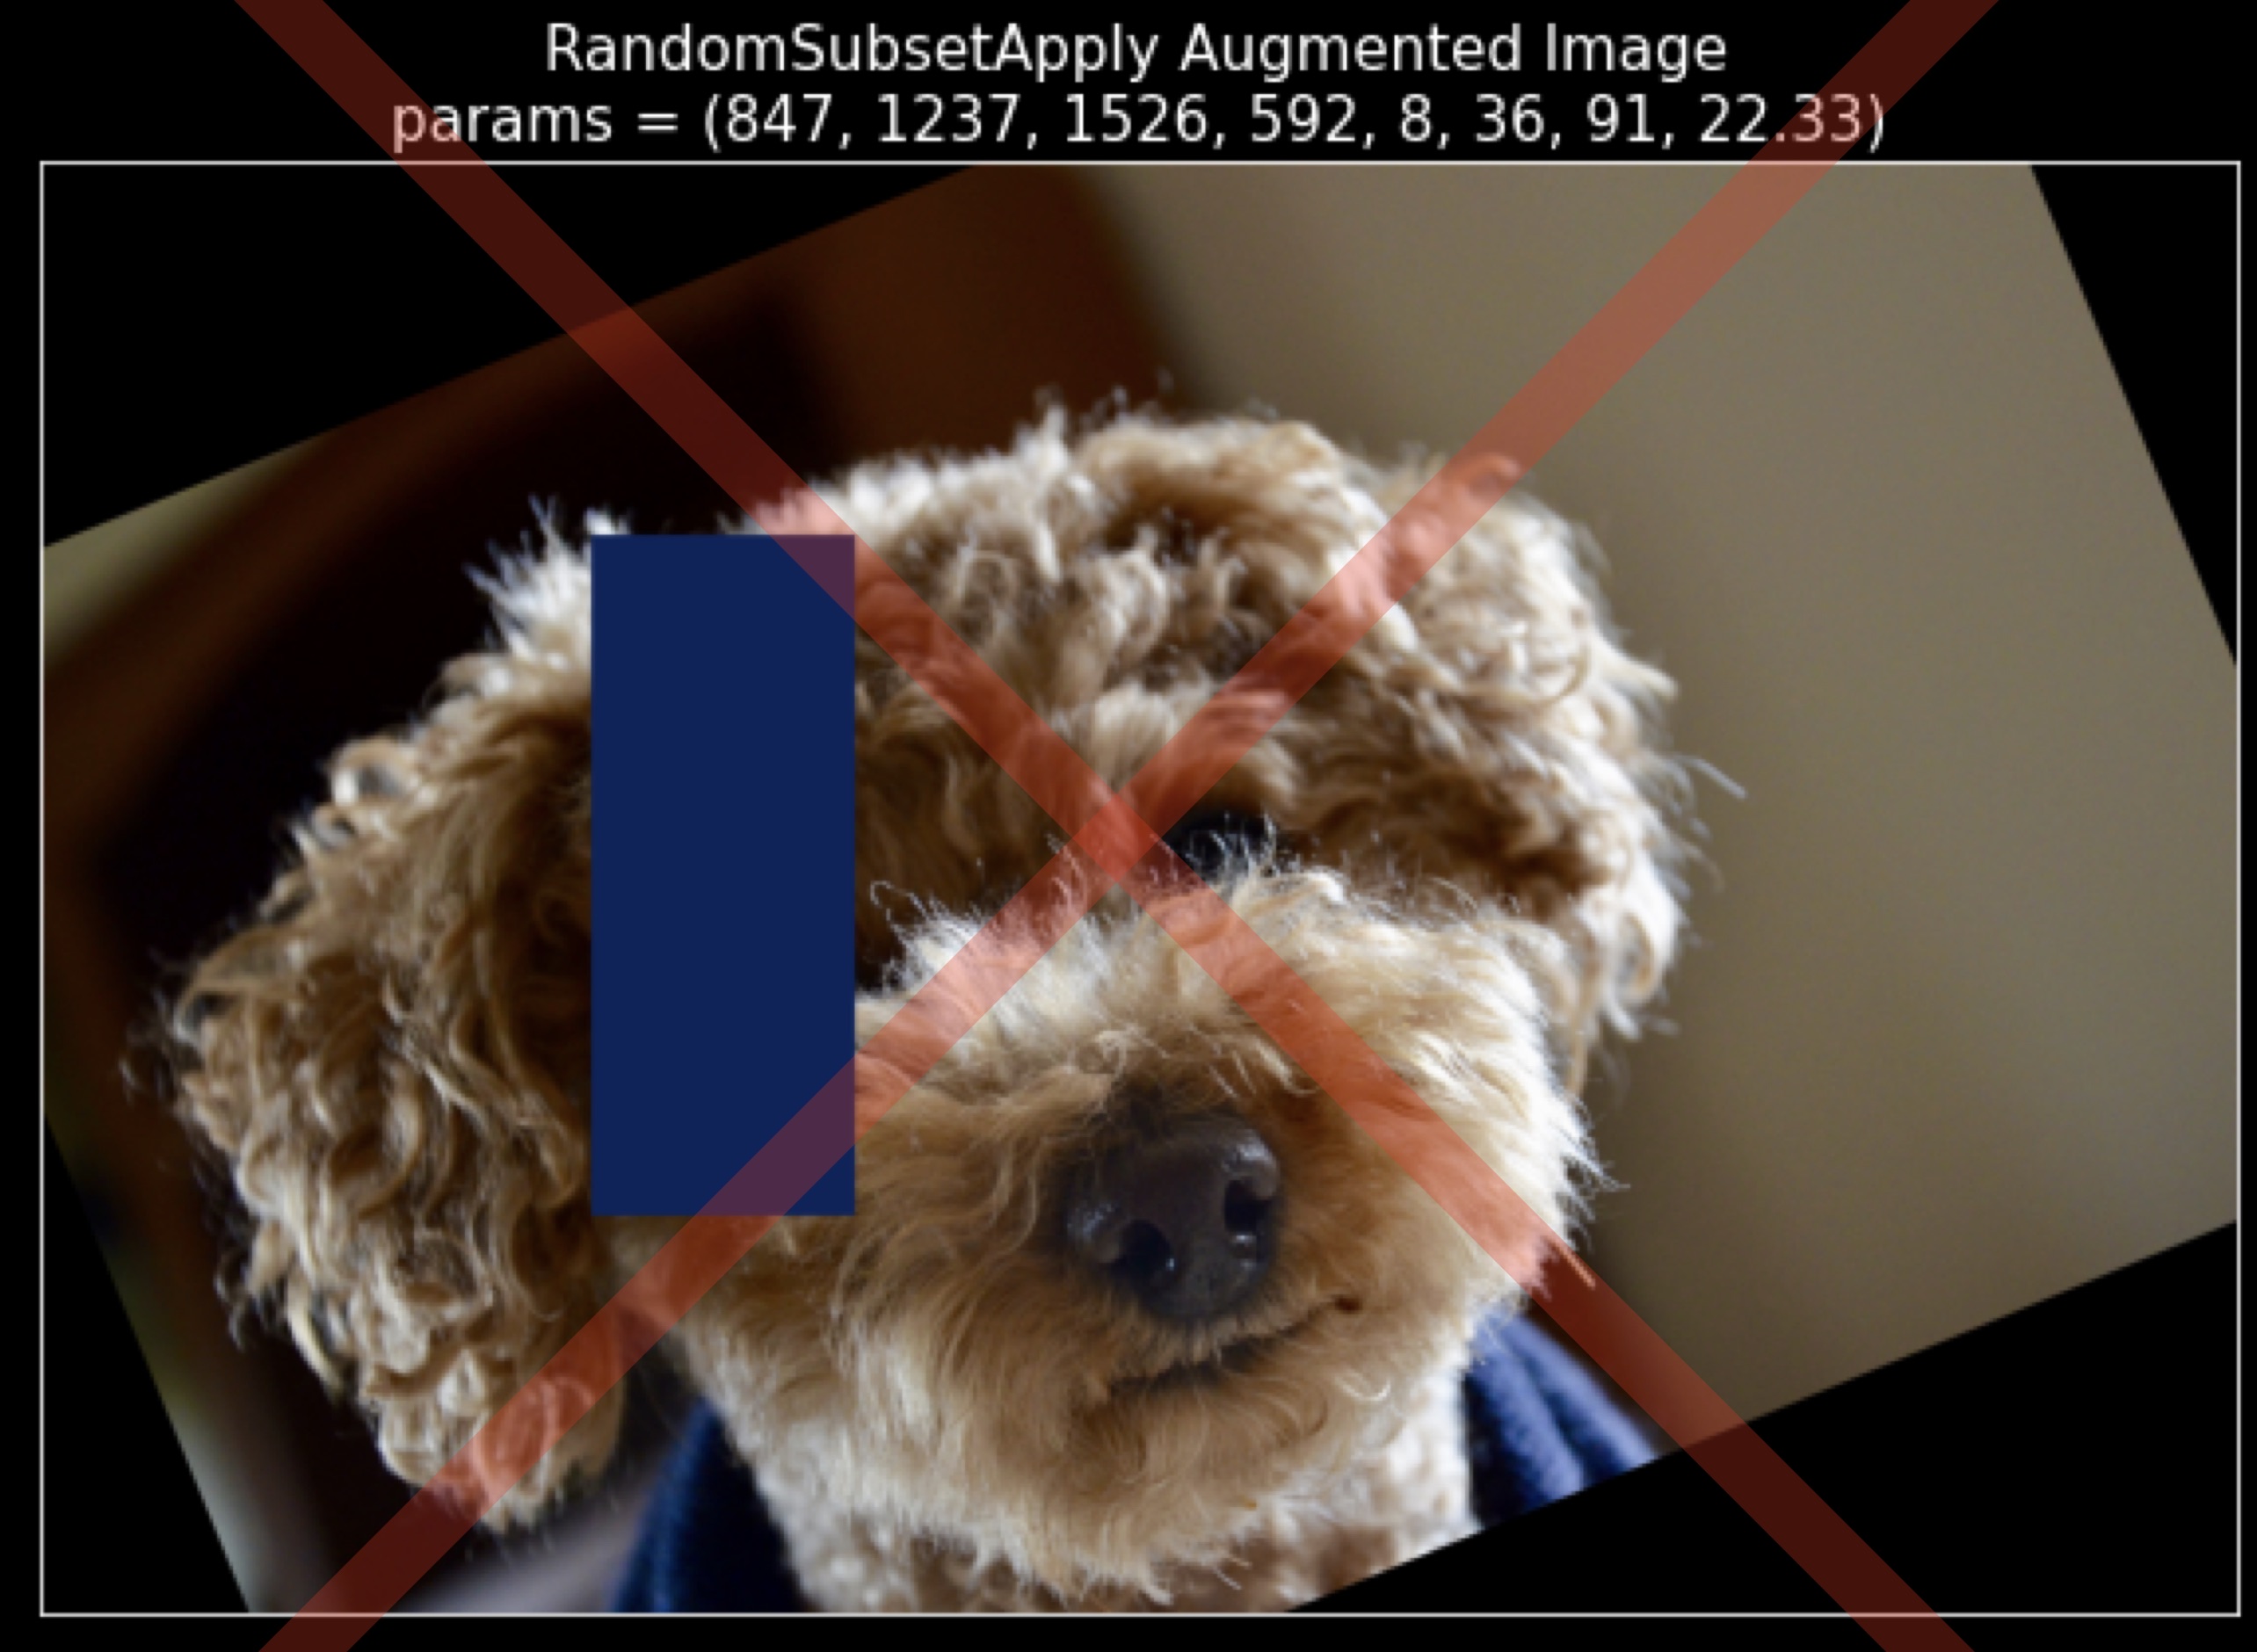
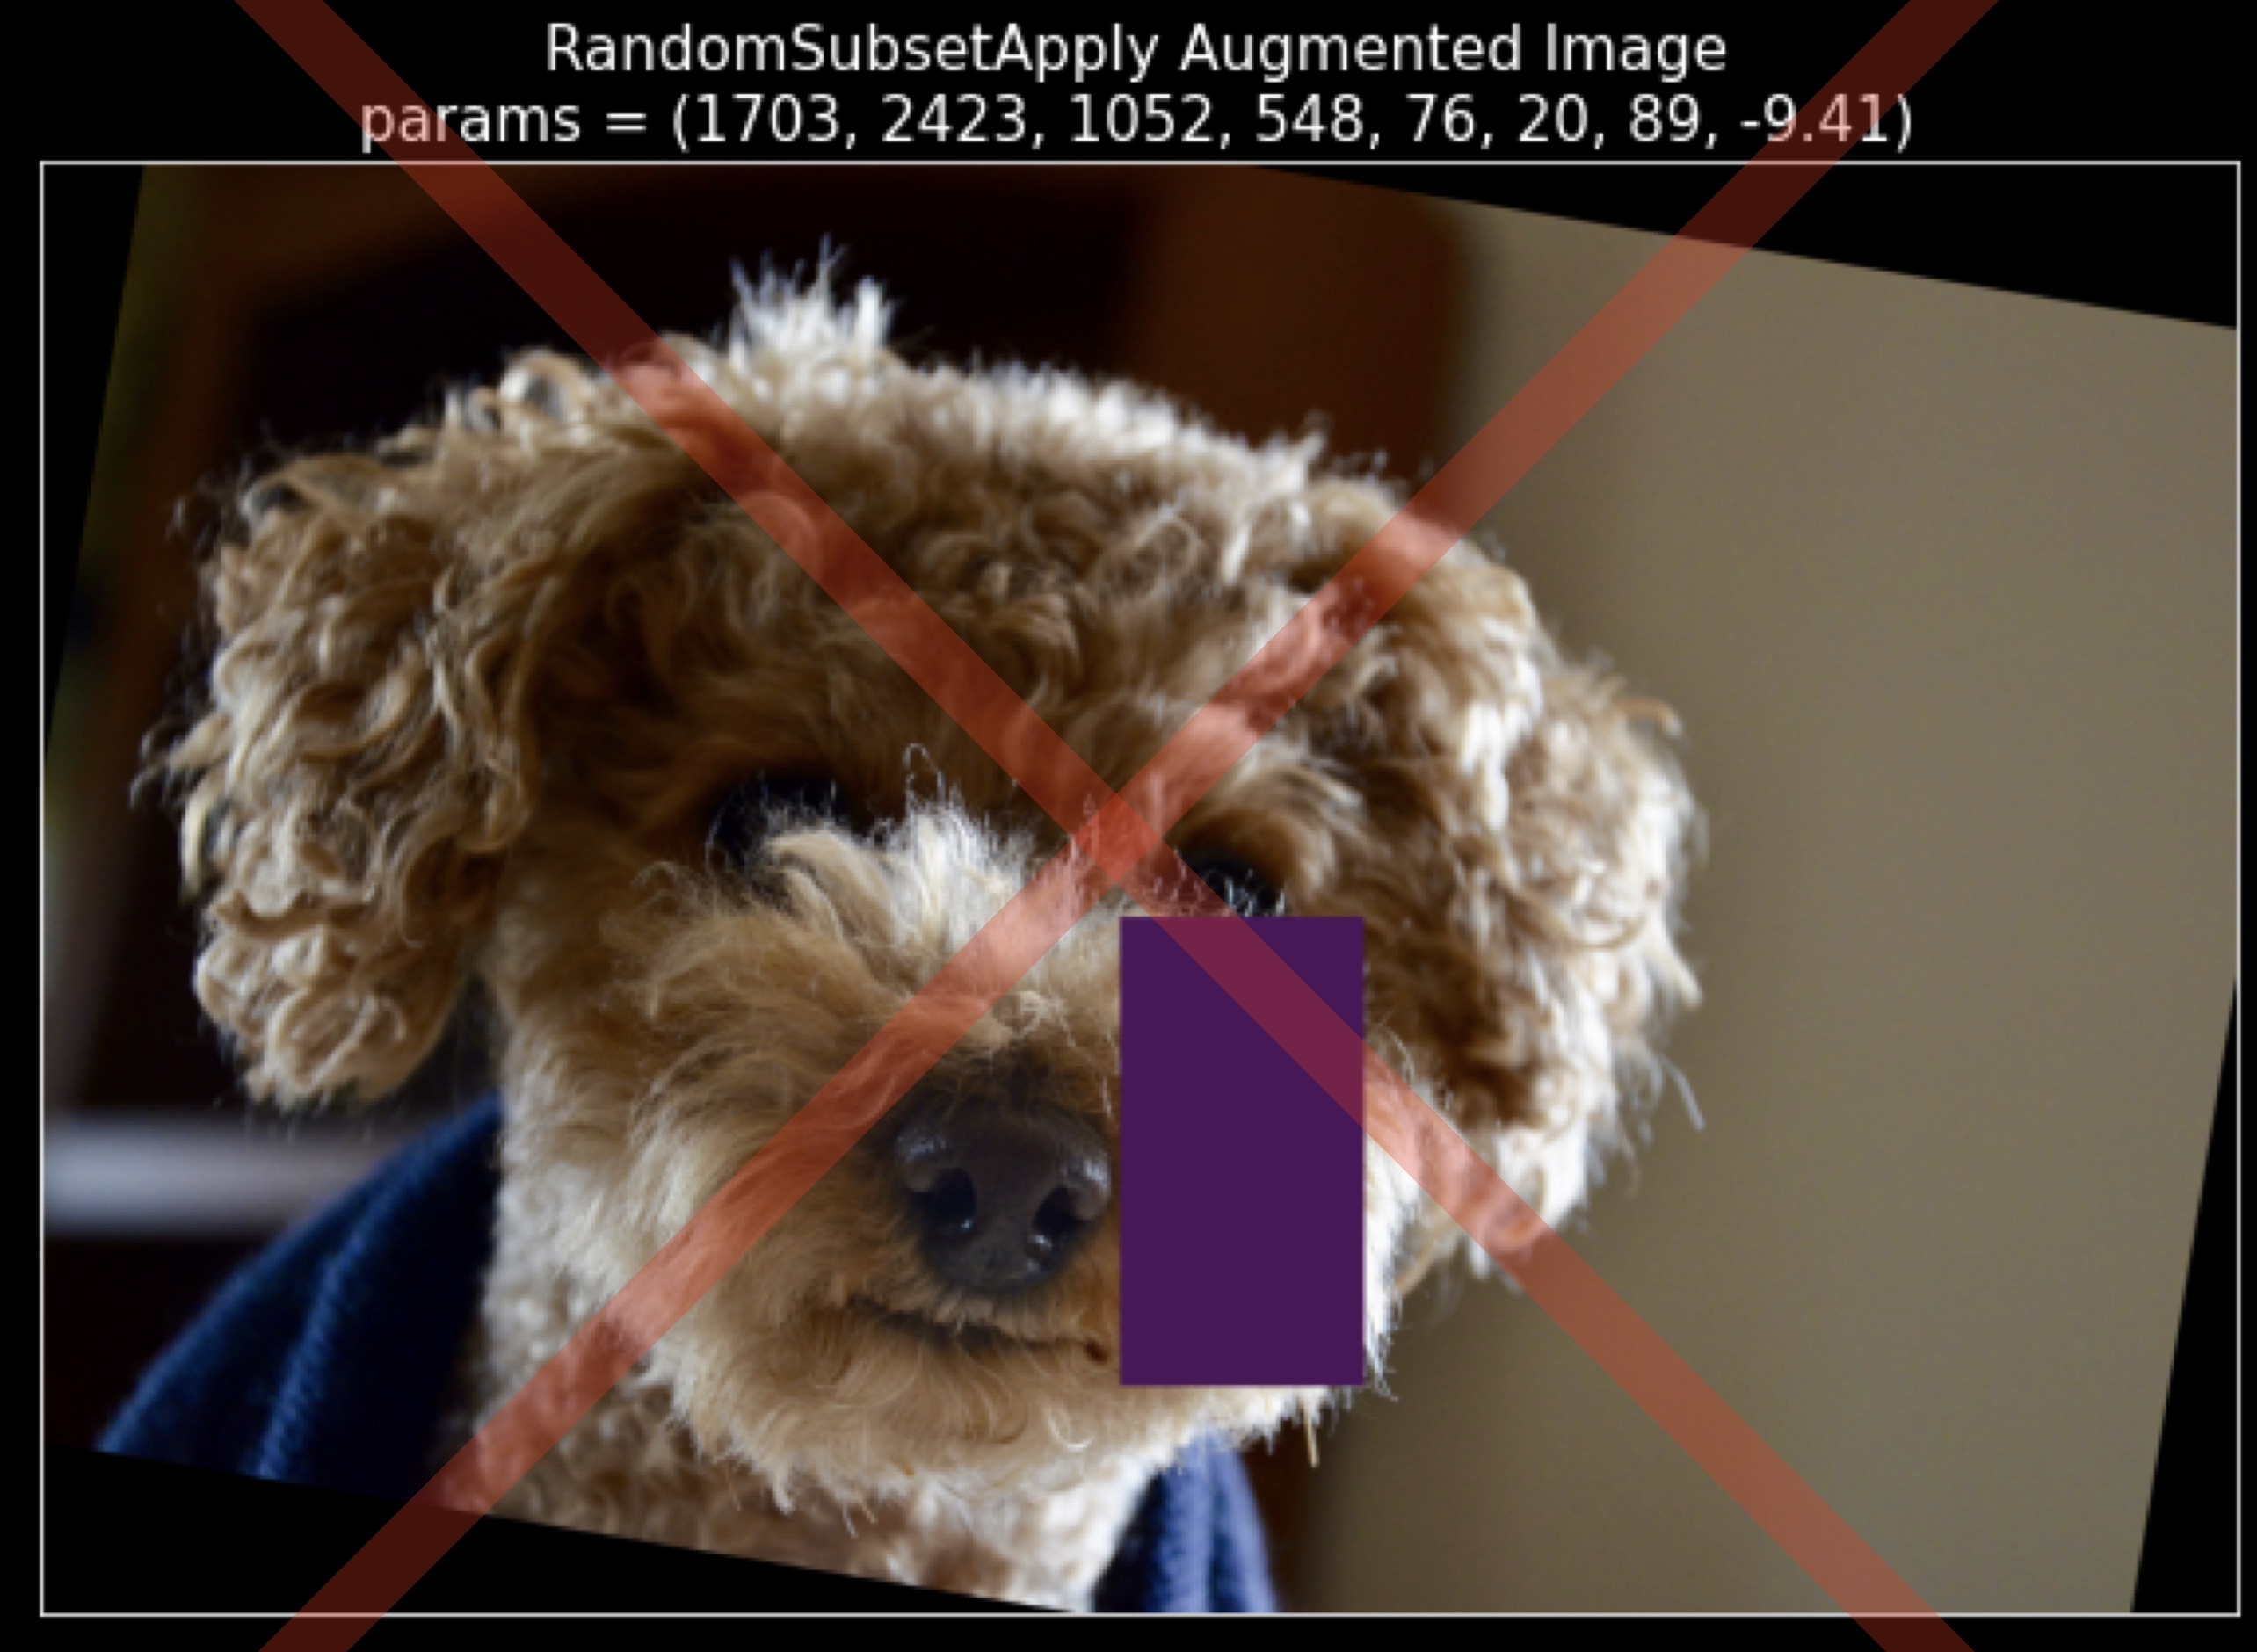
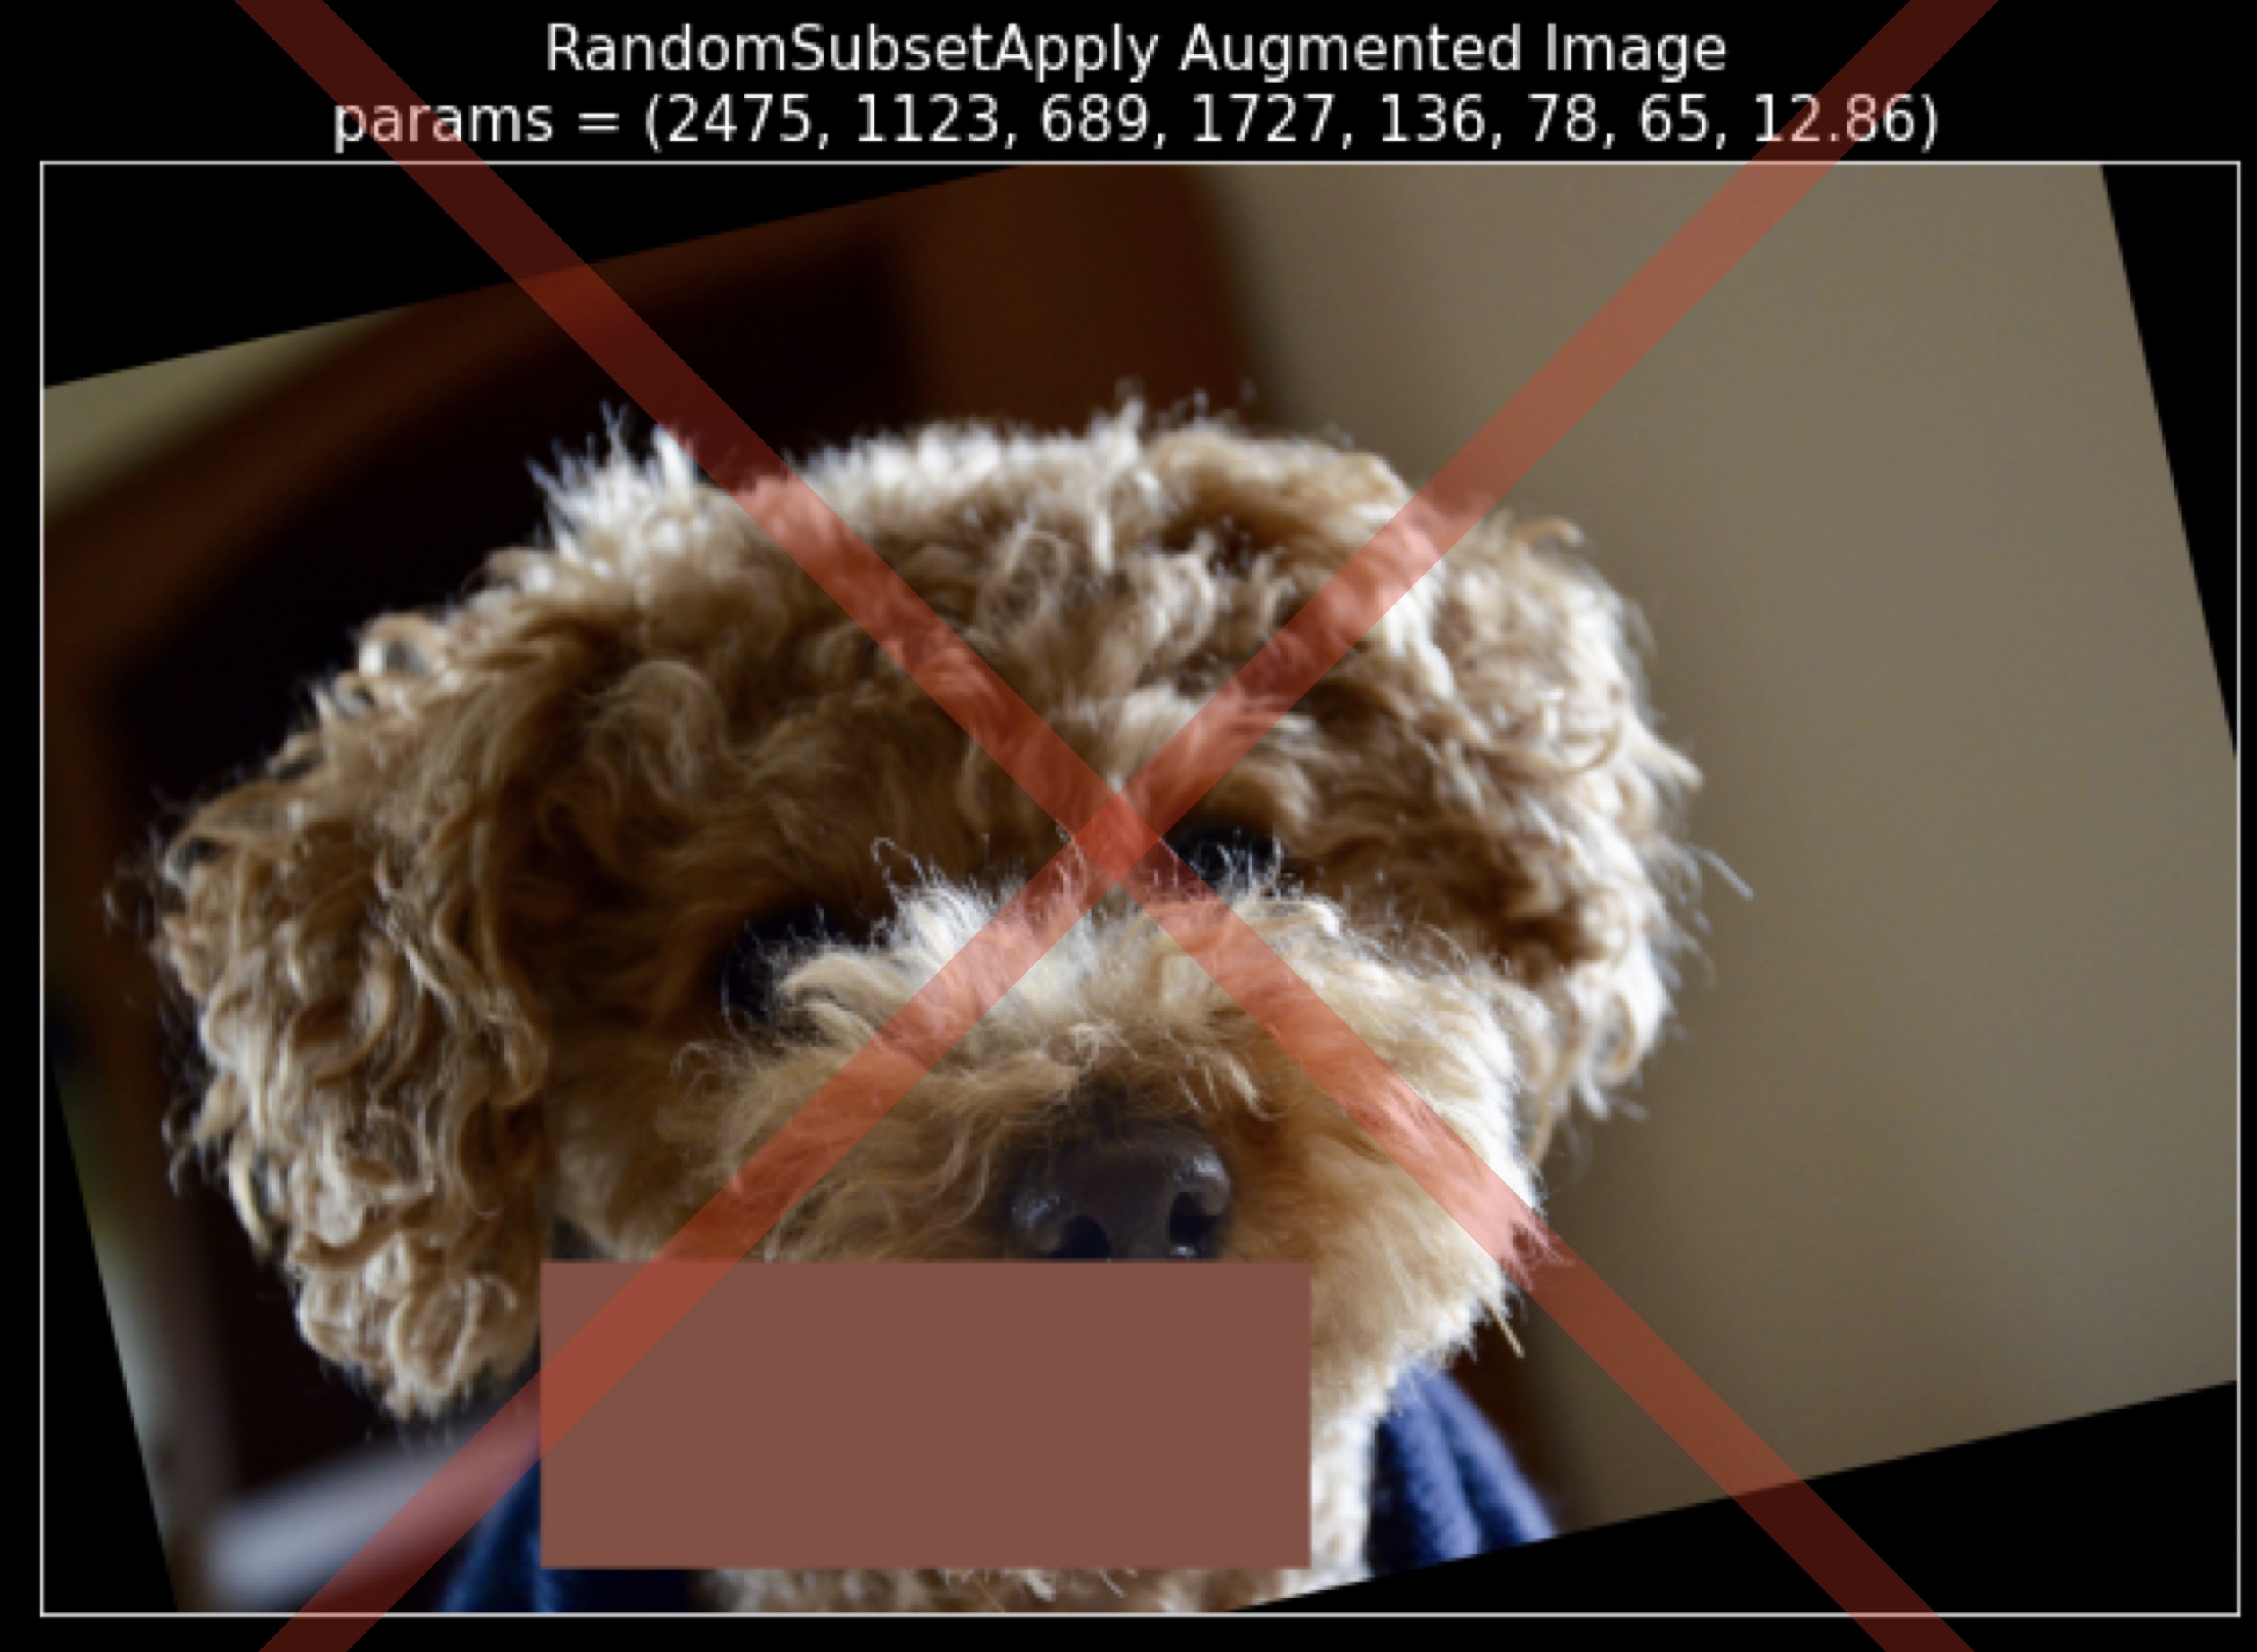
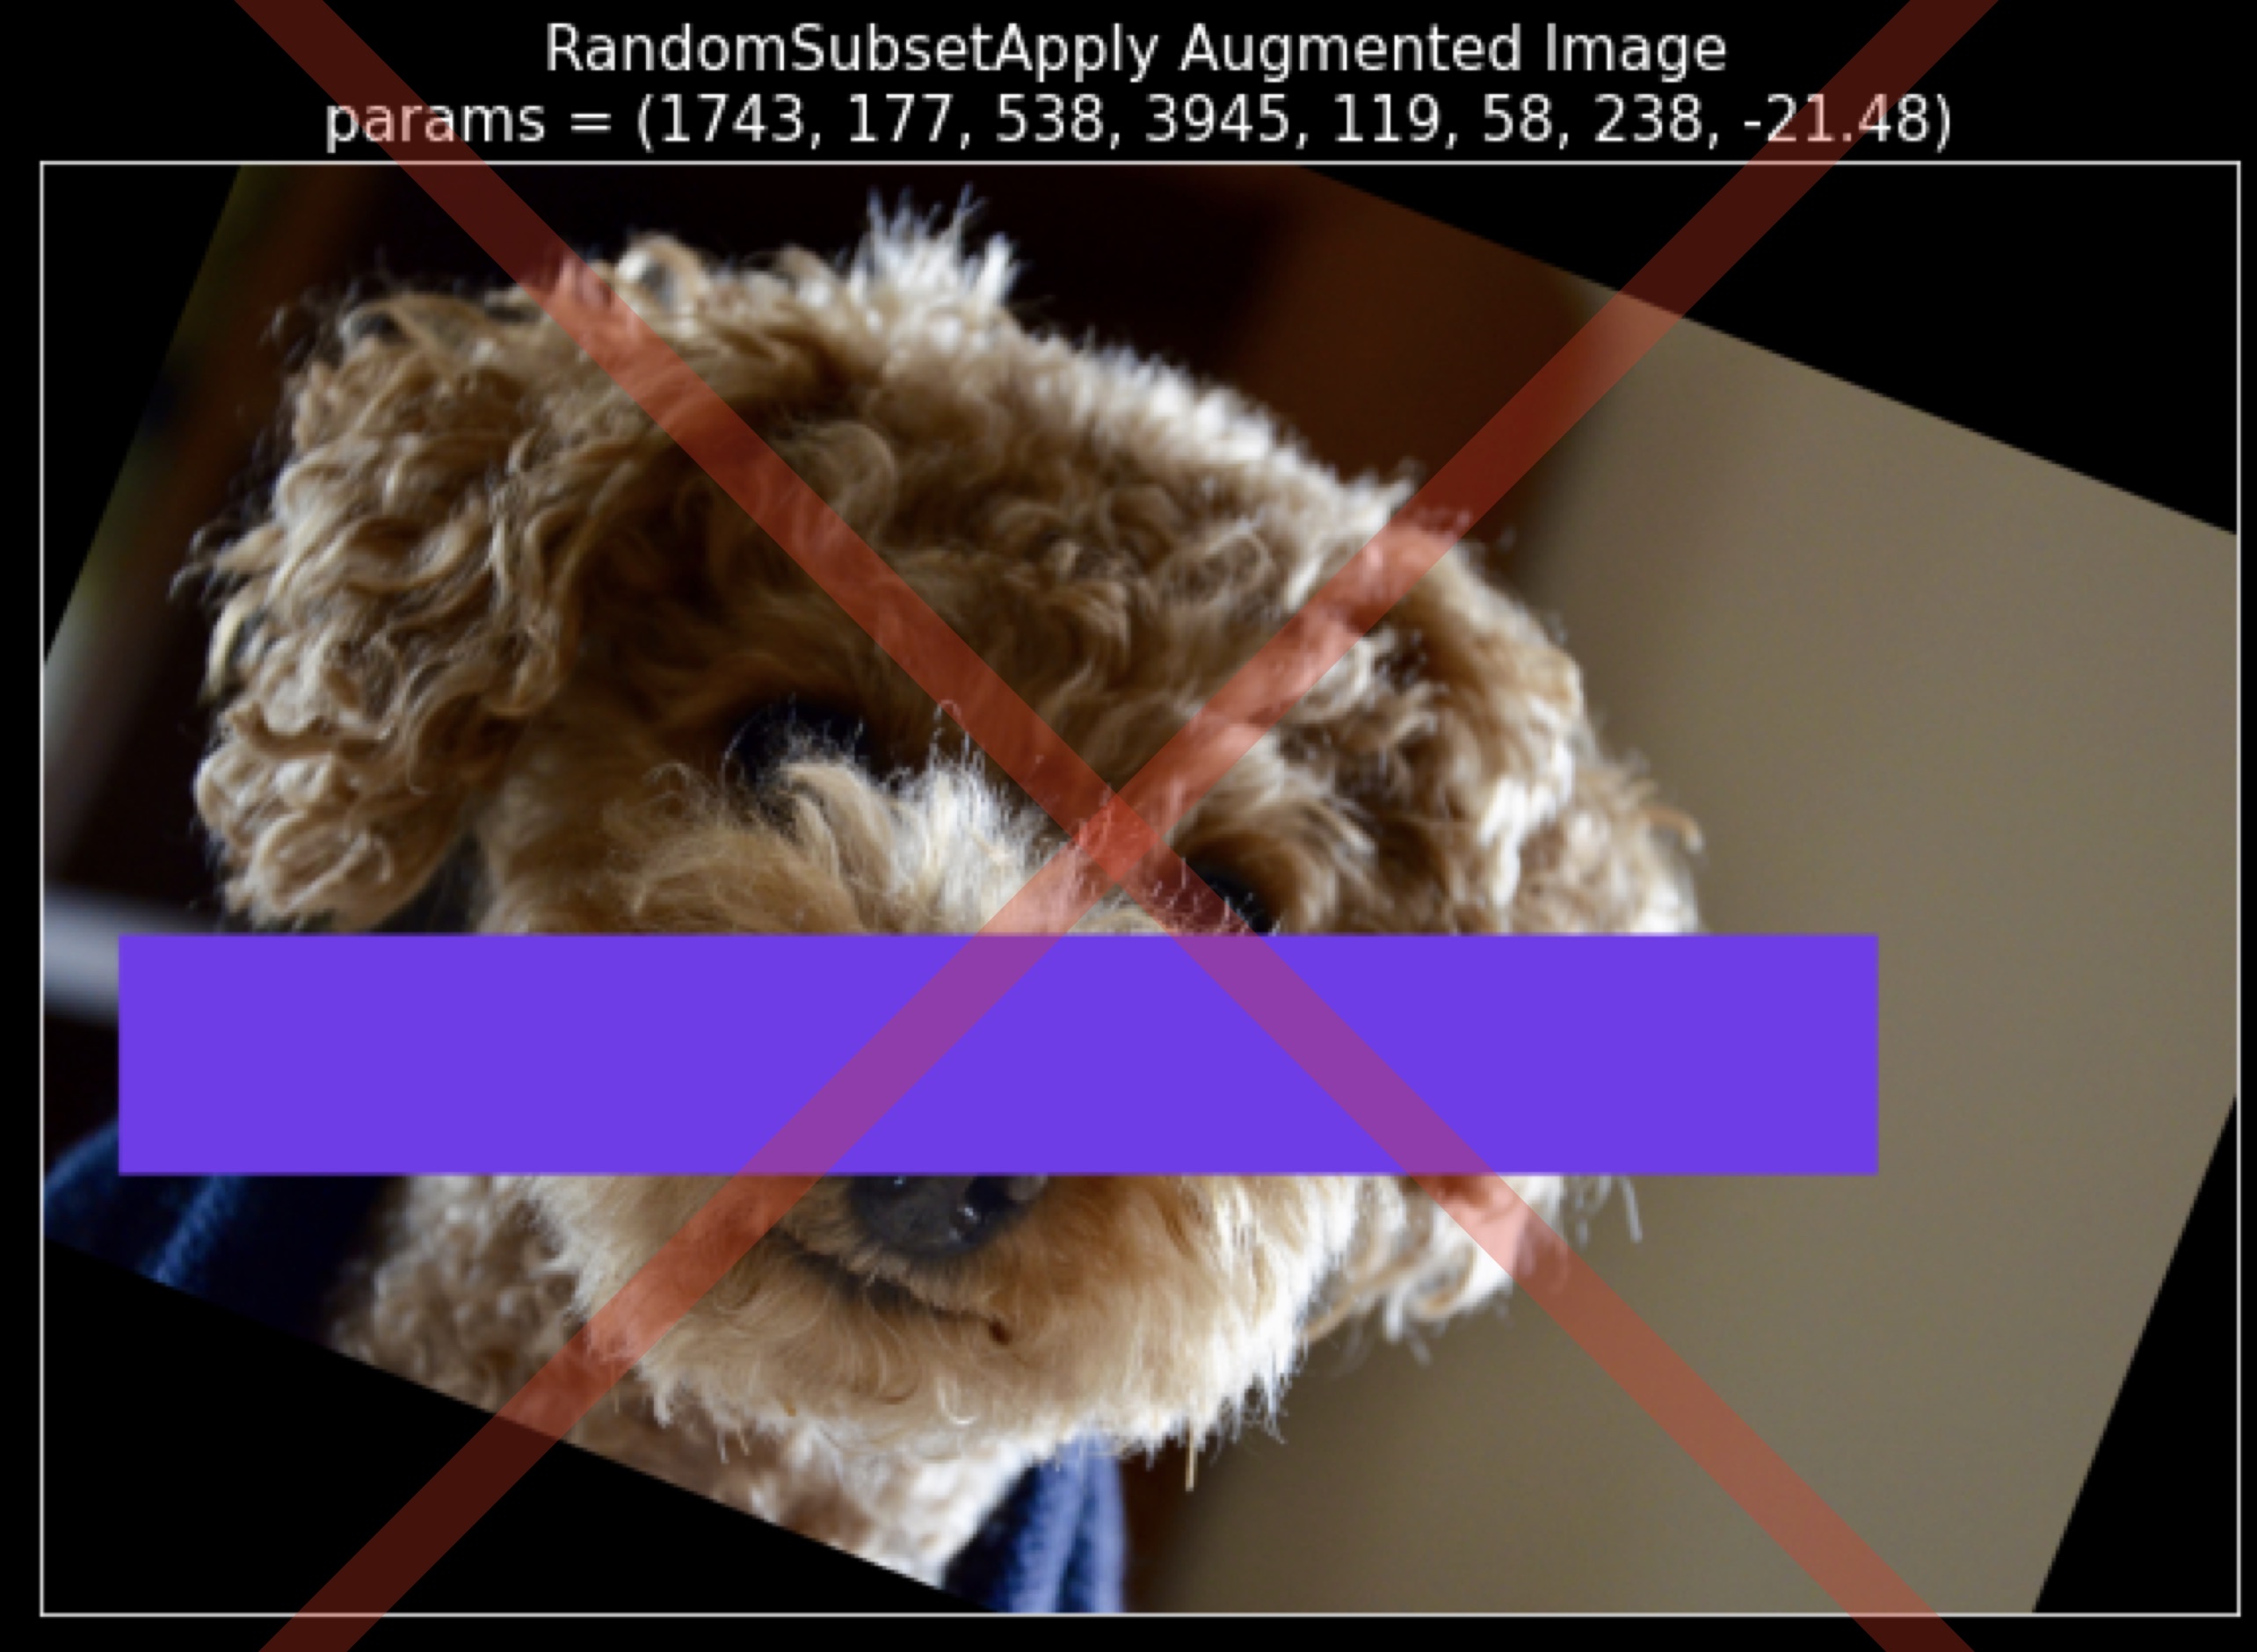
Thus, extremely importantly, we will NEVER observe images that are rotated but have a rectangular region colored with a random color that is axis-aligned with the original image, which would be the result of first applying the
RandomRotationcore transform followed by theRandomColorErasingcore transform.Further, by definition of composing transforms, the output parameters will be a tuple of
8scalars, the first7scalars representing the parameters for theRandomColorErasingtransform and the last parameter will be the angle of rotation of the image in degrees, which is the single parameter generated by theRandomRotationcore transform.Here are some of the augmentations generated by our transform–
|
|
|
|
|
|
|
|
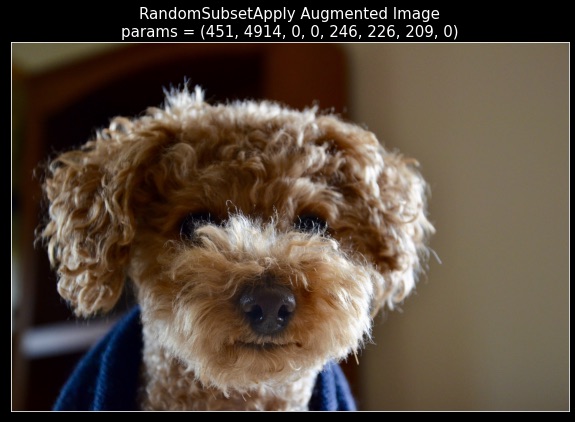


Note that in some cases, the erased rectangle can be difficult to spot due to the size or fill-in color of the erased rectangle.
Ensure that the parameters for the augmentations make sense and that the fraction of different types of behaviors
of this composing transform is consistent with the description above.
Further, ensure that you do NOT see any augmentations where the image is rotated by a non-zero angle but it has a non-rotated rectangular patch erased and colored with a random color. This is because as explained above, that behavior would be the result of first applying
RandomRotationand thenRandomColorErasing. In particular, you should NOT observe any image similar to the ones shown below–
|
|
|
|
Next, similar to the case of
RandomColorErasing, we also perform two sanity checks for theRandomSubsetApplytransform–Let us say that for the original image of Pep, we pass it through the CASCADE mode of
tx_RSAand obtain an augmentationaugand corresponding parametersparams. Now, by definition, if we were to take the original image of Pep along with these parametersparams, and pass it through the CONSUME mode of thetx_RSAtransform, we ought to get the same augmented imageaugback. We can observe that this is indeed the case!Note that the default parameters for
RandomSubsetApplytransform indeed preserve the image and act as identity transform parameters. This is because by definition, the identity parameters ofRandomSubsetApplyare a concatenation of the identity parameters ofRandomColorErasingand the identity parameters ofRandomRotation, both of which preserve the image identity separately. Thus, if we were to pass the original image of Pep the cat, along with the default parameters, through the CONSUME mode of thetx_RSAtransform, we ought to get the original image of Pep back. We can observe that this too is indeed true!
So, we can see that our custom composing transform
RandomSubsetApplybehaves as expected!
About the Next Tutorial#
Now that we have written our own parameterized transforms and verified experimentally that they work as expected, we will see the transforms that are already provided in the package in our next tutorial– 003-A-Brief-Introduction-to-the-Transforms-in-This-Package.