Deployment to Core ML
Note: This functionality is only available on iOS 12+ and macOS 10.14+
The Turi Create Recommender Model is also available for use in your iOS/macOS
apps as a custom model via exporting to Core ML. After creating your model in Turi
Create, save it in Core ML format by calling export_coreml API as follows:
# assume my_recommender is the trained Turi Create Recommender Model
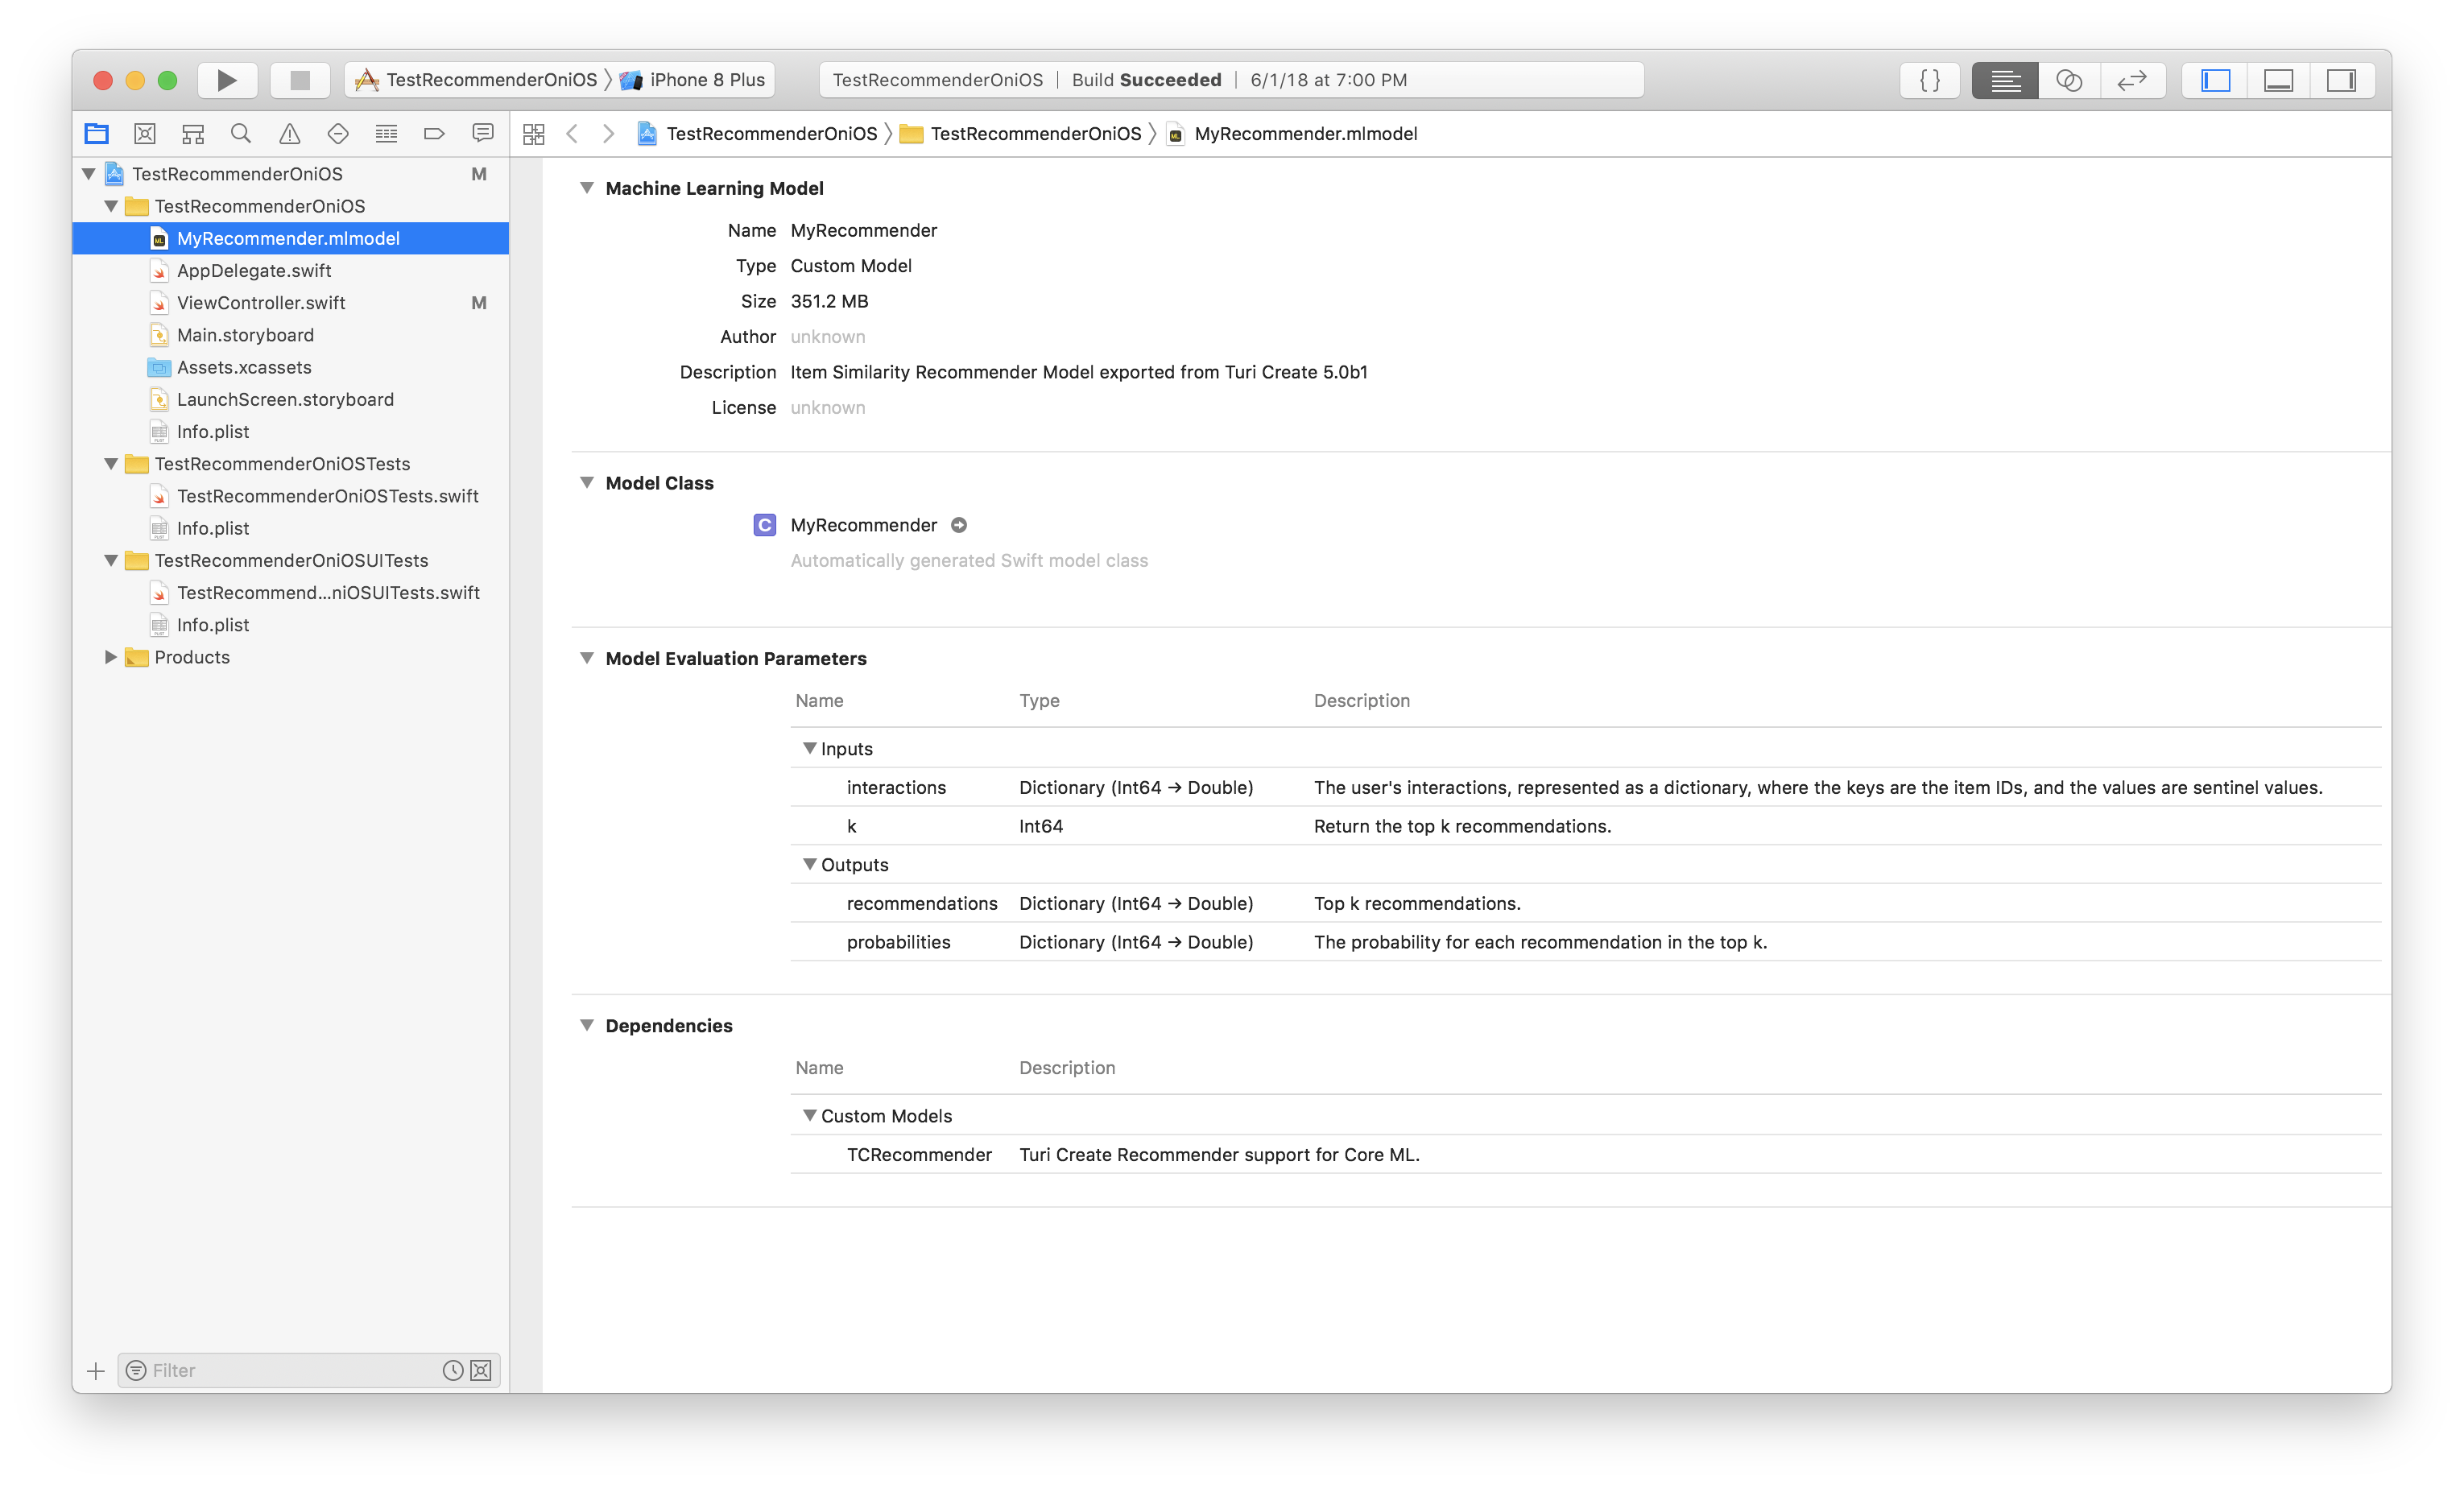
my_recommender.export_coreml("MyCustomRecommender.mlmodel")After you drag and drop the exported Core ML model in your iOS app, it will look something like this:
Before you can go ahead and use the recommender model in your app, you must
drag and drop the relevant .dylib into your app. If you are writing an app
for a Mac or an iOS simulator, you would want the x86_64 variant.
If you are writing an iOS app for the iPhone/iPad, you would want the
arm64 variant.
All the relevant .dylib files are available on the
Github releases page
starting with Turi Create 5.0b3, downloadable as libRecommender.zip.
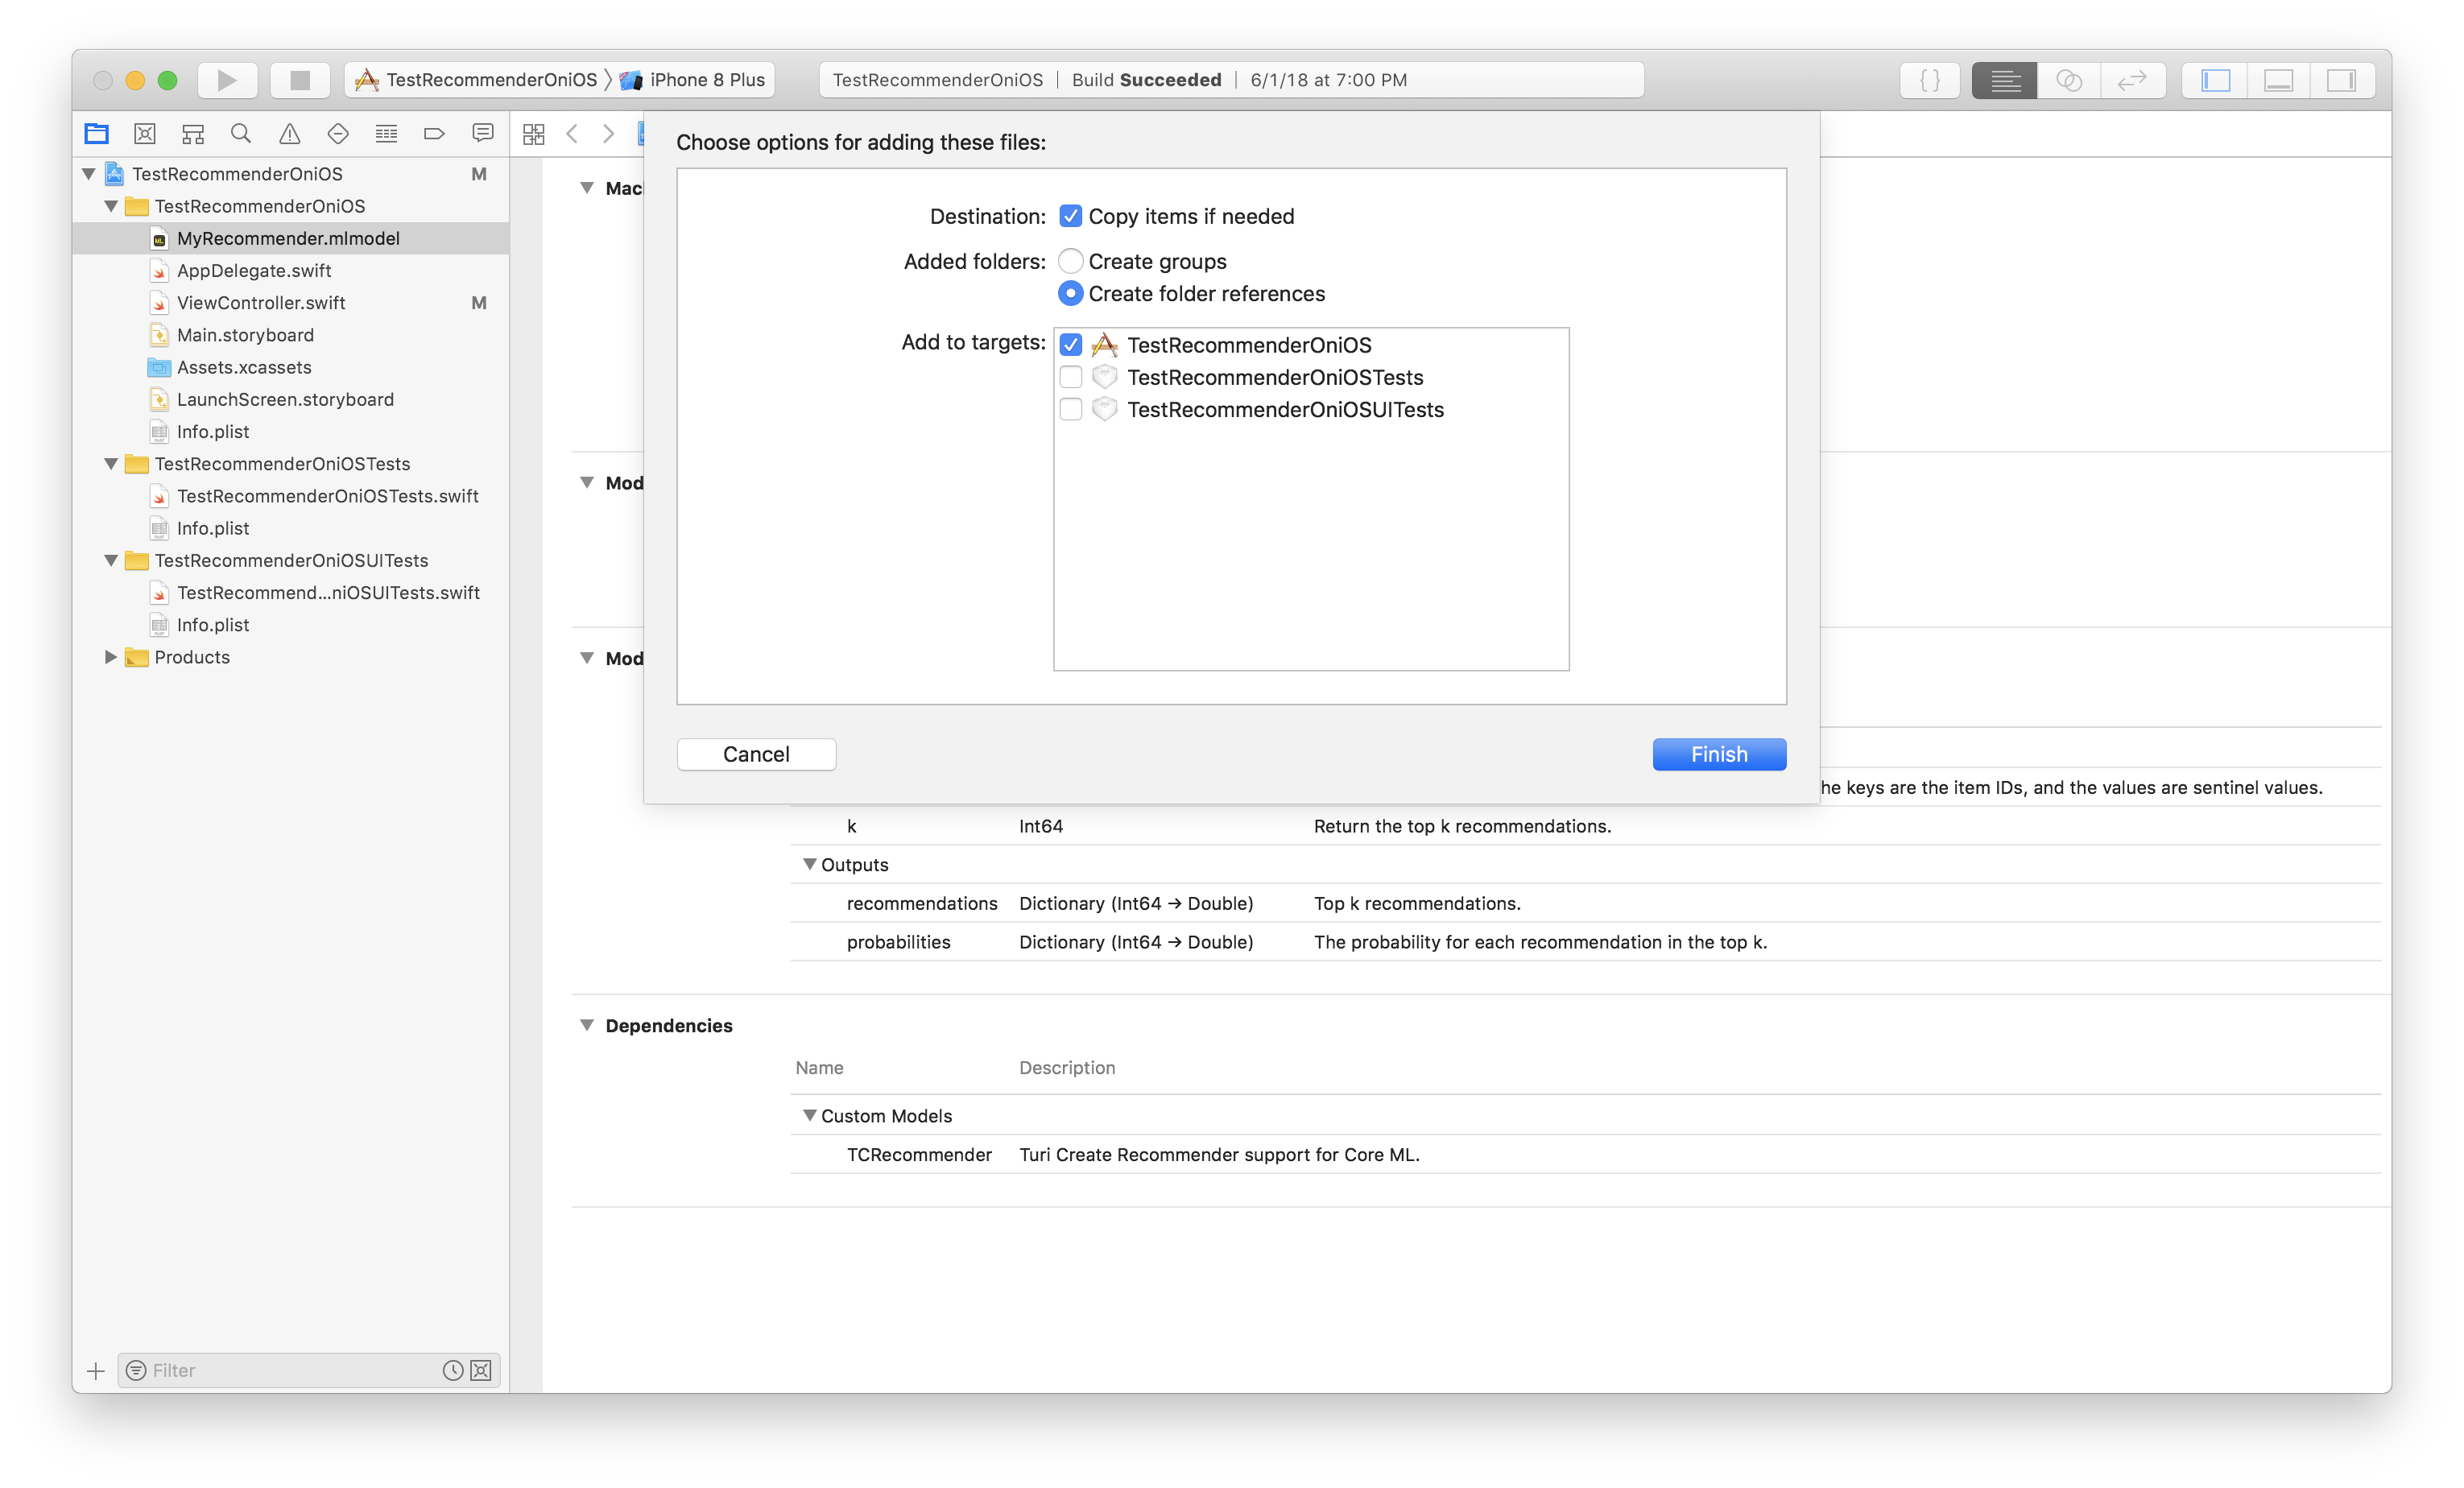
When you drag and drop the .dylib, you must copy all items and create folder
references. Here is a screenshot of what your selections on the dialog box
should look like.
If your project will be submitted to the App Store you will need to package the libAudioPreprocessing.dylib into a Framework in order to avoid an iTunes Connect error. To package the framework properly, follow these steps.
Now, do the following:
- Under Project > Build Phases, add
libRecommender.dylibto Copy Bundle Resources - Under Project > General, add
libRecommender.dylibto Embedded Binaries and to Linked Frameworks and Libraries
Note: if you've packaged the .dylib into a Framework you'll need to perform these steps using the Framework instead of the dylib.
Now, you are ready to start writing app code to use the recommender model you
created in Turi Create (and exported to Core ML) in your iOS app.
As you can see above in the model screenshot in Xcode, you need to give the
model two inputs, interactions and k.
Here is some sample code to demonstrate how to use your exported custom model in a Swift iOS app.
- First, we identify the model we dragged and dropped and assign it to a variable.
let model = MyRecommender();- We now construct the two inputs we need to give to our model to get back some predictions.
let interactions = NSMutableDictionary();
interactions[242] = 6.5;
// this signifies that the user interacted with item 242 and rated it 6.5 on their scale.
let modelInput = MyRecommenderInput(interactions: interactions as! [Int64 : Double], k: 1);- Now that we have created the input to our
MyRecommendermodel, we callpredictionon it to look at the model predictions.
guard let modelOutput = try? model.prediction(input: modelInput) else {
    fatalError("Unexpected runtime error.");
}
print(modelOutput.probabilities);
print(modelOutput.recommendations);
The code sample above is just to give you an idea of how to use the recommender model. The apps that use recommender models can vary across lots of different use cases. Examples include providing recommendations to the user for objects to purchase in a game, recommendations to help users create their avatars, and so on.