Style Transfer
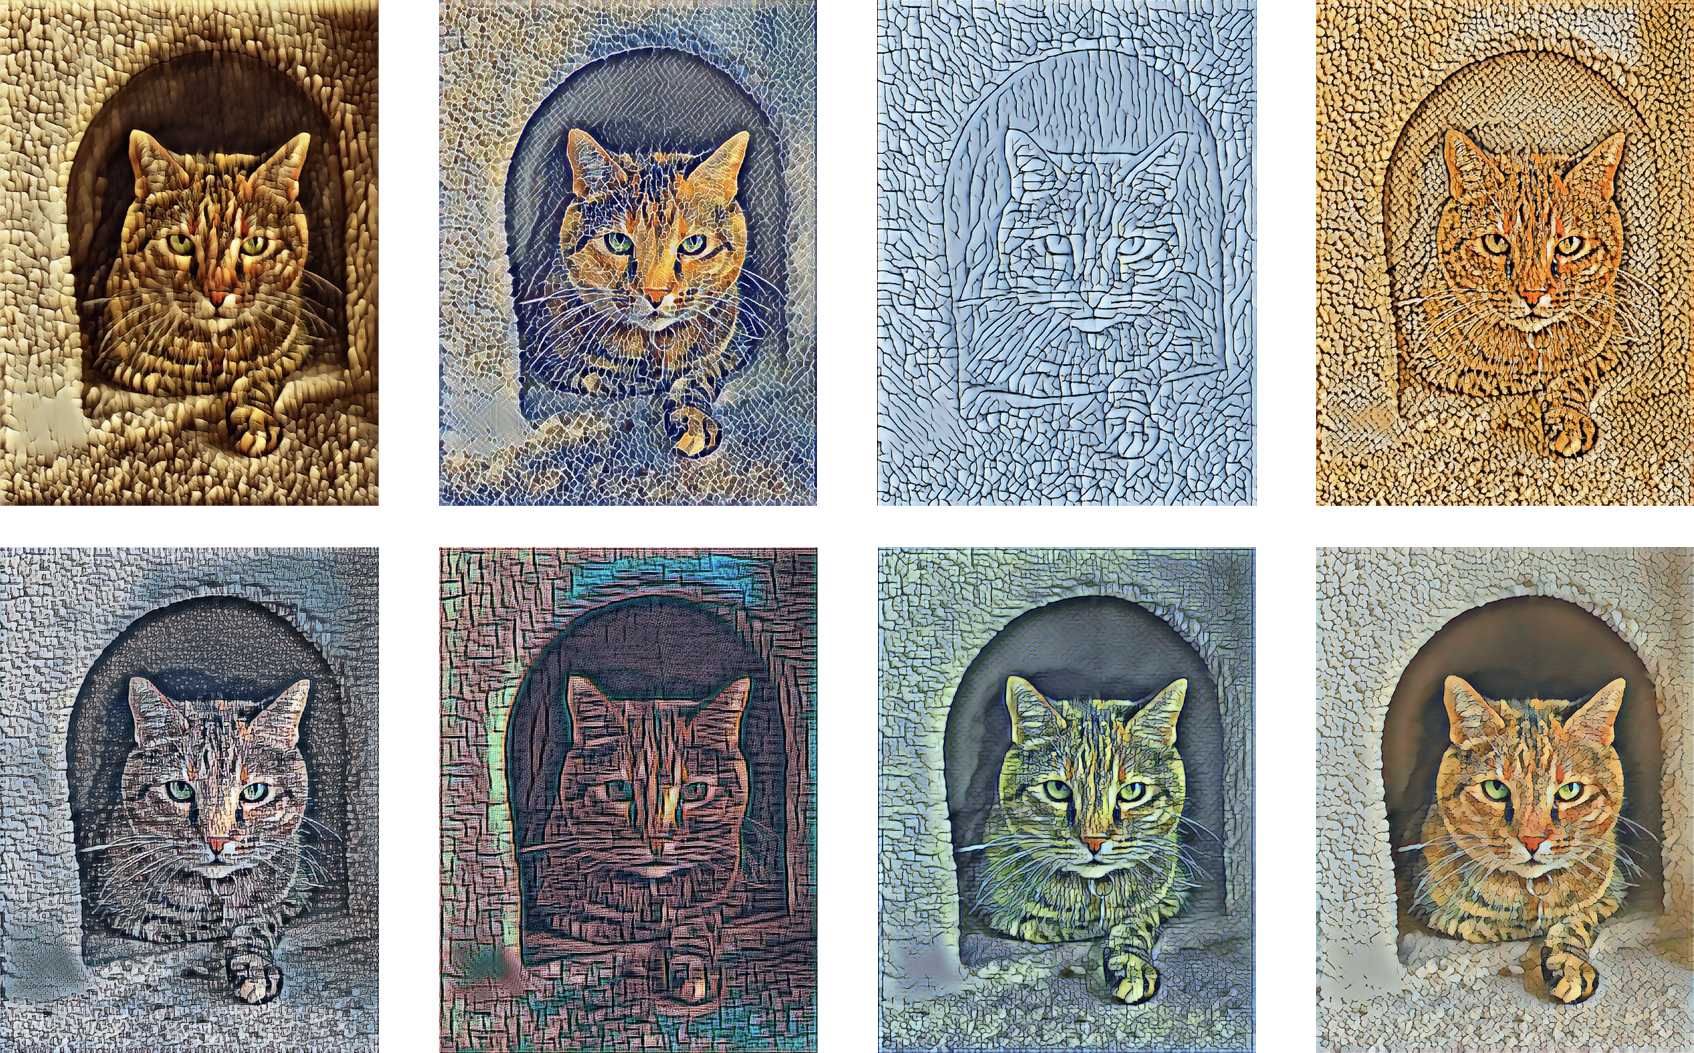
Style Transfer is a task wherein the stylistic elements of a style image are imitated onto a new image while preserving the content of the new image. As an example, a style transfer model that uses these style images when applied to this content image results in:
The training procedure for style transfer requires the following data:
- Content images: A set of representative images in your application
- Style images: A set of style image(s) you would like to learn
Introductory Example
Here is a simple end-to-end example of using style transfer.
import turicreate as tc

# Load the style and content images
styles = tc.load_images('style/')
content = tc.load_images('content/')

# Create a StyleTransfer model
model = tc.style_transfer.create(styles, content)

# Load some test images
test_images = tc.load_images('test/')

# Stylize the test images
stylized_images = model.stylize(test_images)

# Save the model for later use in Turi Create
model.save('style-transfer.model')

# Export for use in Core ML
model.export_coreml('MyCustomStyleTransfer.mlmodel')
Data Acquisition
As described before, style transfer models require style images. Some examples include paintings, textured images, colorful mosaics as found in istock, NGA IMAGES, MET Museum and others. Here are a few style images from istock that contain unique stylistic elements that can create interesting effects.
Style Images

In addition to style images, we also require some content images. These images can be any images that could represent the type of content you might see in your application. As an example, if your application involves a lot of selfies, then using selfies as content images, in the training process, can result in better models.
Content Image

Model Creation
Model creation may take time. If you do not have access to a GPU, it can take up to a day or more to train a good model for one style image. The number of training iterations is determined automatically. You may lower this value to make model creation faster, as the cost of obtaining a potentially worse model. See how it works for more details on how this model works and some more details on advanced options available to you.
Using GPUs
Style transfer model training can be accelerated on Linux using NVIDIA GPUs. To setup GPU training, see instructions here. Training on Mac GPUs is currently not supported.
Creating stylized images
Once your model is created, you can test by stylizing some new images that are not seen during the model creation process.
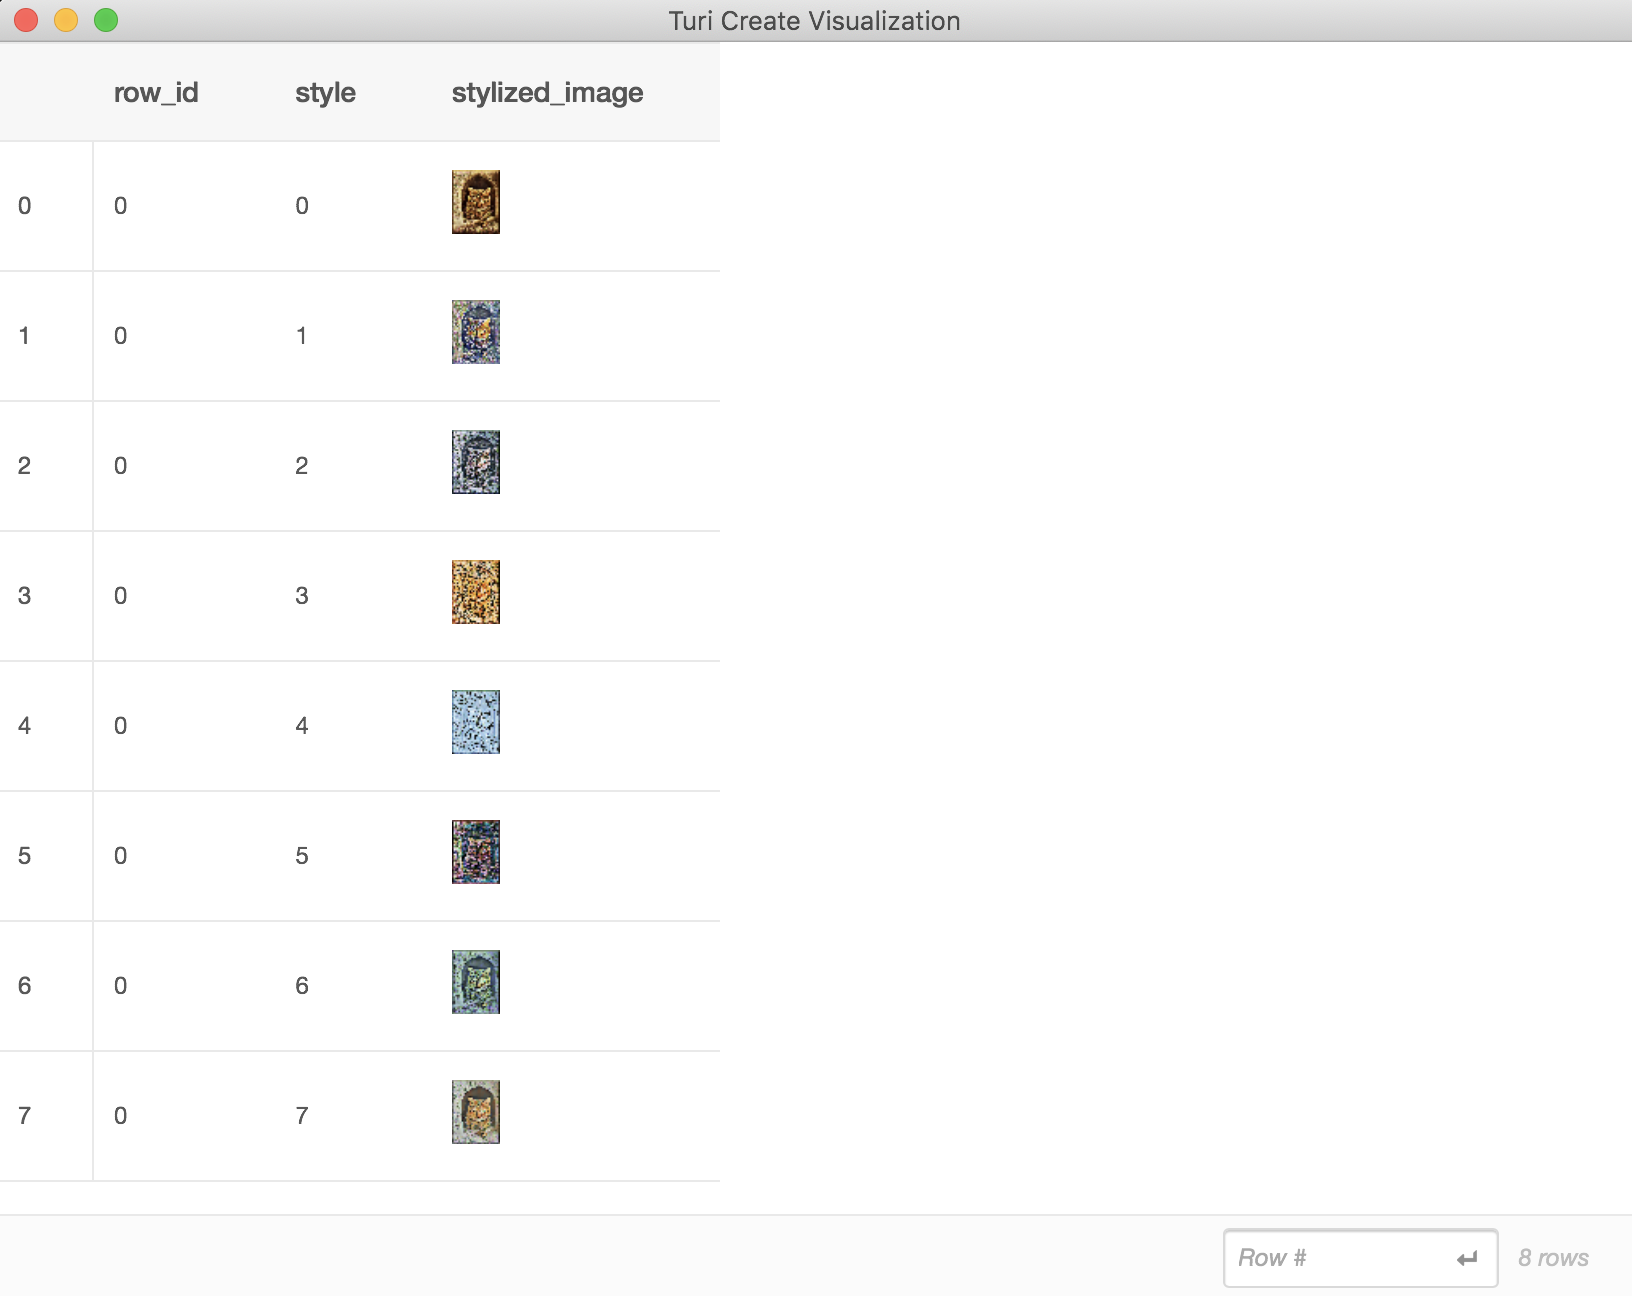
stylized_images = model.stylize(test_images)For a model with 8 styles, the output looks like this:
+--------+-------+------------------------+
| row_id | style |     stylized_image     |
+--------+-------+------------------------+
|   0    |   0   | Height: 256 Width: 256 |
|   0    |   1   | Height: 256 Width: 256 |
|   0    |   2   | Height: 256 Width: 256 |
|   0    |   3   | Height: 256 Width: 256 |
|   0    |   4   | Height: 256 Width: 256 |
|   0    |   5   | Height: 256 Width: 256 |
|   0    |   6   | Height: 256 Width: 256 |
|   0    |   7   | Height: 256 Width: 256 |
+--------+-------+------------------------+
[8 rows x 3 columns]
We can visually explore these results using stylized_images.explore():
By default stylize will apply all the styles of the model to each of the
input images. You can also stylize using selected styles by setting the
style parameter. Here are some examples:
# Only the first style
stylized_image = model.stylize(test_images, style=0)

# A subset of styles
stylized_images = model.stylize(test_images, style=[1, 2])
By default, images with any one side larger than 800px are scaled down
(preserving aspect ratio) so that the largest side of an image is less
than 800px. You can adjust this using the max_size parameter:
stylized_images = model.stylize(test_images, max_size=1024)It is not always the case that stylizing your images at the highest possible resolution will produce the desired effect on your image so we recommend you choose this based on your styles and the desired effect you'd like it to have. The larger the size, the more computationally expensive it is to stylize (without resizing). Please refer to the api docs for more details.
The styles are stored inside the model as an SFrame. You can retrieve it using:
my_styles = model.stylesColumns:
style int
image Image
Rows: 4
Data:
+-------+--------------------------+
| style | image |
+-------+--------------------------+
| 0 | Height: 642 Width: 642 |
| 1 | Height: 642 Width: 642 |
| 2 | Height: 642 Width: 642 |
| 3 | Height: 642 Width: 642 |
+-------+--------------------------+