Typed Execution Workflow Example#
The following example demonstrates the recommended workflow when using ML programs with typed execution. The workflow consists of the following steps:
Convert the model to a float 16 typed Core ML model, which is eligible to execute on a combination of the Neural Engine (NE), GPU and CPU.
Check the accuracy of the Core ML model with the source model on a set of input examples, using an error metric that is suitable for that model.
If the accuracy is not sufficient for the use case, then convert again to a float 32 typed model. This will execute on a combination of the GPU and CPU.
The example converts a TensorFlow 1 pre-trained float 32 neural wave style model based on Fast Style Transfer. This model takes a color image of spatial size (512, 512) as input and returns an output of the same size.
Download the Model and Install TensorFlow 1#
Use this download link to download the model file (
fast_neural_style_wave.pb).This model requires TensorFlow 1, which is deprecated and difficult to install directly with pip. You can use the appropriate Miniconda installer for your operating system and create a conda environment specifically for Python 3.7, and then use conda to install TensorFlow 1:
conda create -n tensorflow1-env python=3.7
conda activate tensorflow1-env
conda install tensorflow==1.15
For alternatives, see How to pip install old version of library(tensorflow) on StackOverflow.
Install the following for this conda environment:
pip install -U coremltools
pip install pillow
conda install matplotlib
Convert the Model to an ML Program#
To convert the model to an ML program, import coremltools and use the convert() method:
import coremltools as ct

model = ct.convert("fast_neural_style_wave.pb",
                   inputs=[ct.ImageType(shape=[1, 512, 512, 3])],
                   compute_precision=ct.precision.FLOAT16)
During conversion, a graph pass called FP16ComputePrecision is automatically applied, which casts each float 32 tensor in the original TensorFlow graph to a float 16 tensor in the ML program.
Compute Precision Parameter
The compute_precision=ct.precision.FLOAT16 argument sets the precision to float 16. While this was required in coremltools 5.0b1, the FLOAT16 argument is the default setting in the 5.0b3 release and newer releases, and is therefore no longer required for this example.
Make a Prediction#
To make a prediction with the newly converted Core ML model, follow these steps:
Download and save the following sample image as
seats.jpg.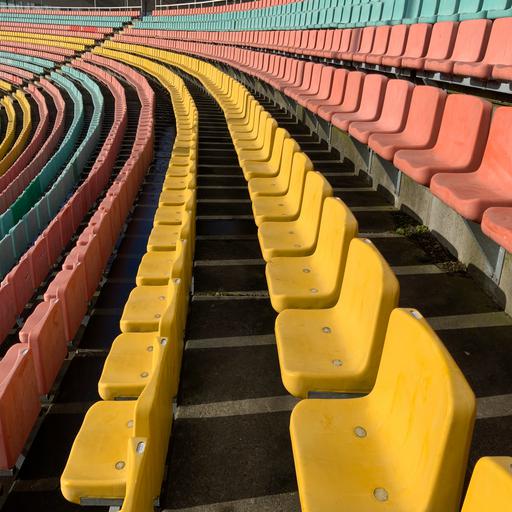
Right-click on this image and save it as
seats.jpgbefore running the following code snippet.#Add the following code to load the image using
PIL(the Python image library, which you installed aspillowin the previous section):from PIL import Image img = Image.open("seats.jpg").resize((512, 512), Image.ANTIALIAS)
Run a prediction:
# make a prediction
spec = model.get_spec()
model_input_name = spec.description.input[0].name
model_output_name = spec.description.output[0].name

coreml_out = model.predict({model_input_name : img})
coreml_output_tensor = coreml_out[model_output_name]

print("shape of coreml output: ", coreml_output_tensor.shape)
shape of coreml output: (1, 512, 512, 3)
Make a Source Model Prediction for Comparison#
Using the same input image, compute the prediction with the source (TensorFlow 1) model to compare its output with the Core ML output. To do so, first import numpy and tensorflow:
import numpy as np
import tensorflow as tf

tf.reset_default_graph()
original_gdef = tf.GraphDef()

with open("fast_neural_style_wave.pb", "rb") as f:
    original_gdef.ParseFromString(f.read())

session_config = None
with tf.Graph().as_default() as g, tf.Session(config=session_config) as sess:
    tf.import_graph_def(original_gdef, name='')
    ops = g.get_operations()

    img_np = np.array(img).astype(np.float32) # (512,512,3)
    img_np = np.expand_dims(img_np, axis=0) # (1,512,512,3)

    feed_dict = {ops[0].name + ":0" : img_np}

    tf_out_tensor = sess.run(model_output_name + ':0', feed_dict=feed_dict)

print("TF output shape: ", tf_out_tensor.shape)
TF output shape: (1, 512, 512, 3)
Compare the Outputs#
Use the signal-to-noise ratio (SNR) to compare the outputs, which compares the level of a desired signal to the level of background noise — an appropriate metric for comparing not only image outputs but neural network feature maps in general.
The following code snippet shows how to compute the SNR between any two tensors of the same shape:
def _compute_SNR(x, y):
    x = x.flatten()
    y = y.flatten()
    noise = x - y
    noise_var = np.sum(noise ** 2) / len(noise) + 1e-9
    signal_energy = np.sum(y ** 2) / len(y) + 1e-9
    if signal_energy < 1e-10:
        return 100 # clip max SNR
    else:
        max_signal_energy = np.amax(y ** 2)
        SNR = 10 * np.log10(signal_energy / noise_var)
        return SNR
SNR = _compute_SNR(tf_out_tensor, coreml_output_tensor)
print("SNR between the Core ML output and TF output: ", SNR)
SNR between the Core ML output and TF output: 71.38136549121856
Note
The actual SNR may vary slightly depending on the hardware that runs the code.
For most ML applications, an SNR above 20dB indicates that the models perform similarly. However, a good practice is to verify the error metric not just on a single input data point, but over a set of examples, such as on all inputs from the training set or the validation set. While this SNR looks good, it would be better to know the SNR of a float 32 converted model.
Convert and Compare with Foat 32 Precision#
To compare how well the converted model’s output matches with the source model’s output at higher precision, convert the source model again, but this time with float 32 precision:
model_fp32 = ct.convert("fast_neural_style_wave.pb",
                       inputs=[ct.ImageType(shape=[1, 512, 512, 3])],
                       compute_precision=ct.precision.FLOAT32)

coreml_out_fp32 = model_fp32.predict({model_input_name : img})
coreml_output_tensor_fp32 = coreml_out_fp32[model_output_name]

SNR = _compute_SNR(tf_out_tensor, coreml_output_tensor_fp32)
print("SNR between the float 32 Core ML output and TF output: ", SNR)
This time the FP16ComputePrecision graph pass is skipped since the precision was set to float 32.
SNR between the float 32 Core ML output and TF output: 95.75957654819682
As expected, the float 32 model is indeed more accurate and matches even better with the source pre-trained float 32 TensorFlow model.
Make a Visual Comparison#
Since the output tensor corresponds to image data, you can also plot it and test the match between the models visually. The following code snippet uses matplotlib to produce output for all three models for comparison:
from matplotlib import pyplot as plt

def _normalize(x):
    if np.amin(x) < 0:
        x = x - np.amin(x)
    x = x / np.amax(x)
    return x

fig, ax_array = plt.subplots(1, 4)
ax_array[0].imshow(img)
ax_array[1].imshow(_normalize(np.squeeze(coreml_output_tensor)))
ax_array[2].imshow(_normalize(np.squeeze(coreml_output_tensor_fp32)))
ax_array[3].imshow(_normalize(np.squeeze(tf_out_tensor)))
ax_array[0].set_title("Input Image", fontsize=15)
ax_array[1].set_title("Core ML float16 model output", fontsize=15)
ax_array[2].set_title("Core ML float32 model output", fontsize=15)
ax_array[3].set_title("Source model output", fontsize=15)
[ax_array[i].axis('off') for i in range(4)]
plt.show()
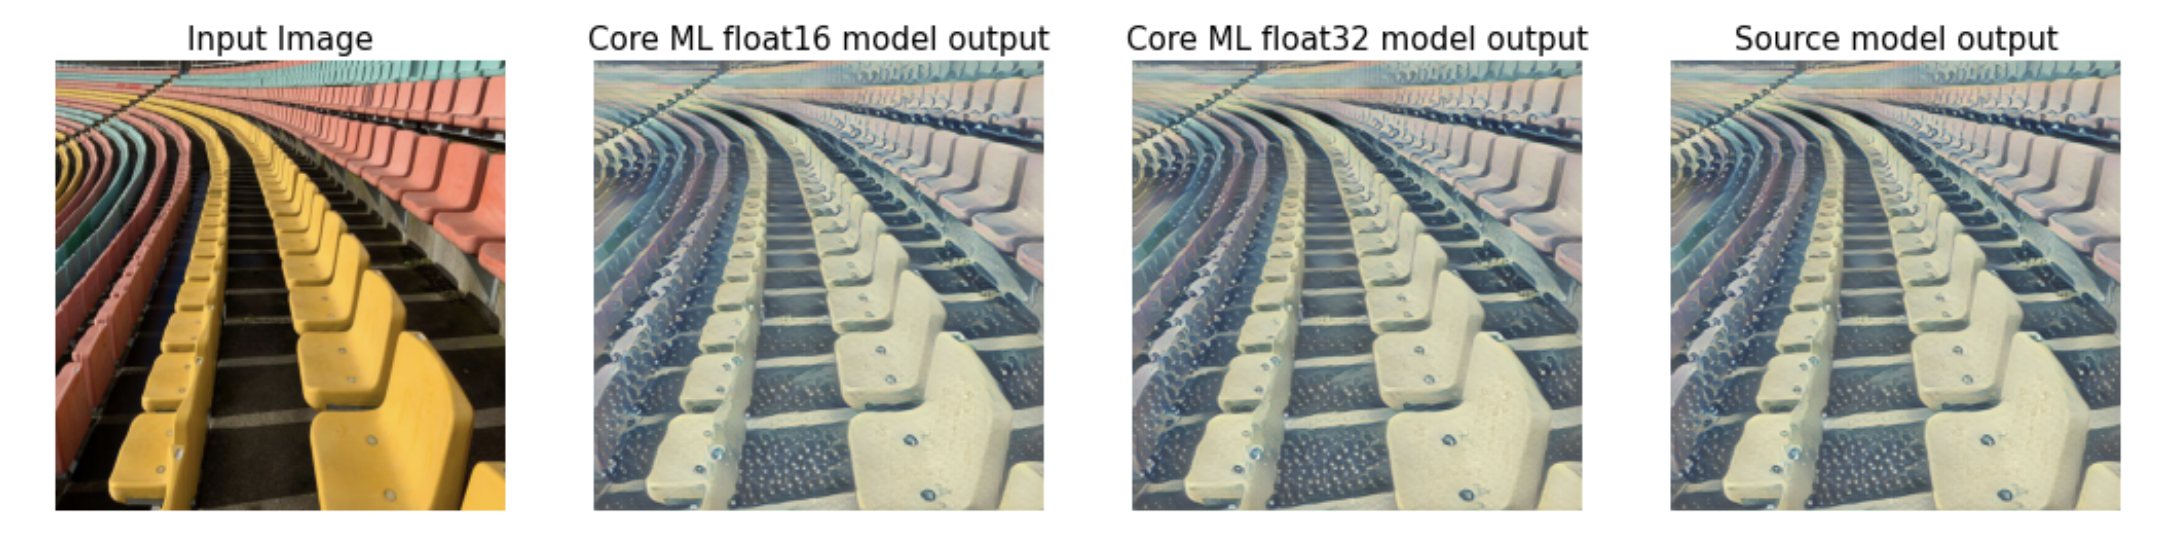
Testing the match between the models visually.#
As expected it is hard to spot any difference! With an SNR of 70dB, the float 16 typed Core ML model is sufficient. Since the output is a new stylized image, it does not need to exactly match that of the original model, as long as it represents the style faithfully.
While the float 16 version of the model performs well with this image, the best practice would be to check a set of validation images. If their SNRs are also high, you would deploy the float 16 version model, as it can execute on the NE as well as the GPU and CPU.