Optimization Workflow#
Core ML Tools offers two ways to incorporate model compression into your workflow:
Post-training data-free compression. Use this faster method with a Core ML model, either created or converted from another model. You can quickly try different techniques with different configurations.
Training-time compression. Use this method with a PyTorch model while in training. It lets you fine-tune with data for higher accuracy.
Since model compression is a lossy operation, in both cases you should evaluate the model on the validation data set and compare it with the uncompressed model to ascertain the loss in accuracy and see if that is acceptable.
Post-Training Compression#
Start with a Core ML model that uses float precision weights. It can be a model you created and trained yourself, or a pre-trained model, in either case converted by the convert() method. This workflow is also commonly referred to as post-training quantization.
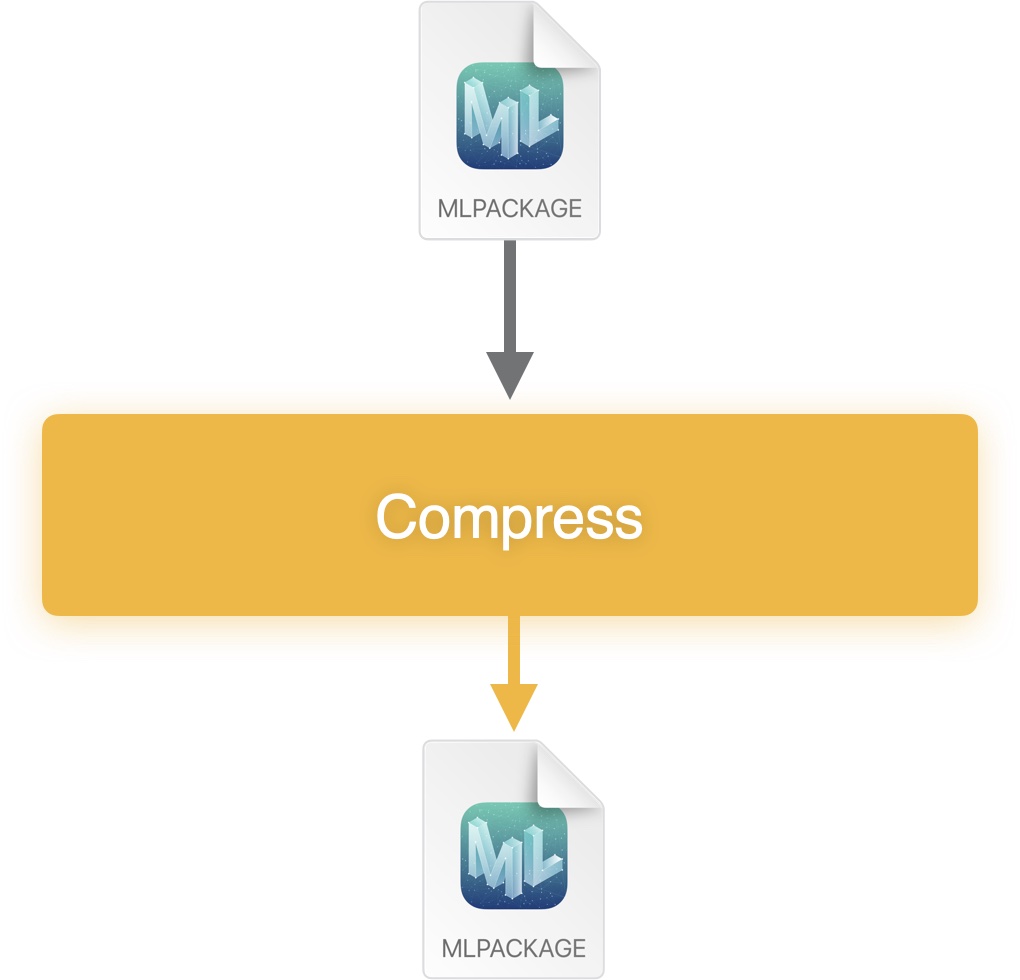
Post-training (data-free) model compression workflow.#
Compression Steps#
To directly compress the Core ML model, follow these steps:
Load the
.mlpackagemodel in memory using themodels.MLModel()API in Core ML Tools.Use one of the methods available in
optimize.coreml.*that takes the loaded model, iterates over its weights one-by-one, compresses them, and then returns an updated model with these compressed weights. For available options, see optimize.coreml API overview.Save the model to disk.
Benefits and Drawbacks#
Benefits of this post-training approach include:
It is data free; that is, you do not need to have access to the training data.
It is fast, as no fine-tuning is involved. Compressing very large models still takes time, as an optimization algorithm runs when compressing the weights. However, compared to fine-tuning with data, this method is much faster.
These benefits make this approach more flexible. You can try different techniques with different configurations relatively quickly, to compare accuracy and performance impacts (such as size and latency). The results can guide you to decide whether to deploy the compressed model resulting from this process, or to explore training-time compression to improve accuracy, which involves fine-tuning with data.
A drawback of this approach is that you may observe a steep decline in accuracy as compared to the amount of compression, depending on the model and the task. That is, for lower amounts of compression, you may observe the accuracy to be close to that of the uncompressed model, but as you choose configurations to increase the compression, the accuracy may decline very sharply.
Training-Time Compression#
Train your model in a compression-aware fashion, or start from a pre-trained float precision model and fine-tune it with training data. The resulting model typically has higher accuracy because compression is introduced gradually and in a differentiable manner to allow the weights to readjust to the new constraints imposed on them.
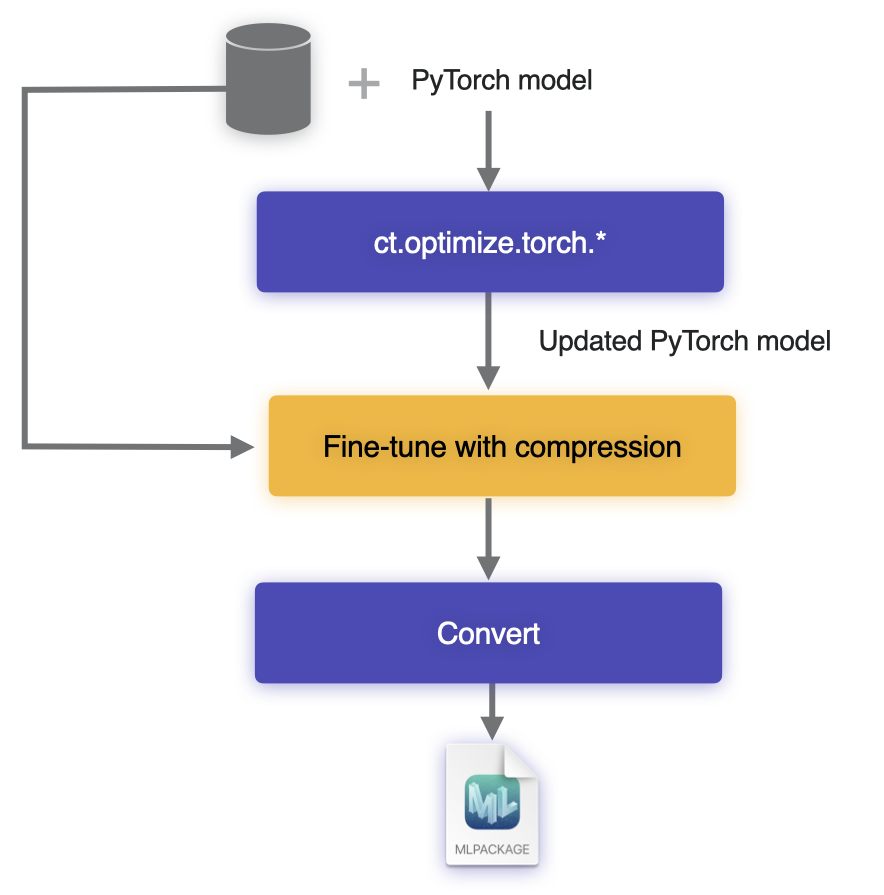
Training-time optimization workflow.#
Incorporate Compression Into Training Workflow#
To incorporate optimizations compatible with Core ML into your training workflow, follow these steps:
Before fine-tuning, make sure that the PyTorch model can be exported to Core ML using the
convert()method. This will ensure that you are starting with a model that is compatible with Core ML.Use one of the compression methods from the
optimize.torch.*module to update your PyTorch model (see Training-Time Compression).Fine-tune the model using the original training code for a few iterations. Then export the model to Core ML and measure performance to decide whether or not you are satisfied with it.
Fine-tune the model fully, using the data and the original PyTorch training code, until the desired level of accuracy is achieved. The weights will get adjustments to allow for compression.
Convert the model to Core ML using the
convert()method. You may need to pass an additional flag during conversion to indicate to the converter which compression scheme was employed during fine-tuning, so that it can pick the appropriate weight representation. For details, see optimize.torch API overview.
Benefits and Drawbacks#
The benefit of this approach, compared to post-training compression, is that you can get a more favorable trade-off in accuracy vs. compression amount. The drawbacks include requiring training data and spending more time in fine-tuning, the costs of which may be very high, especially for a relatively larger model.
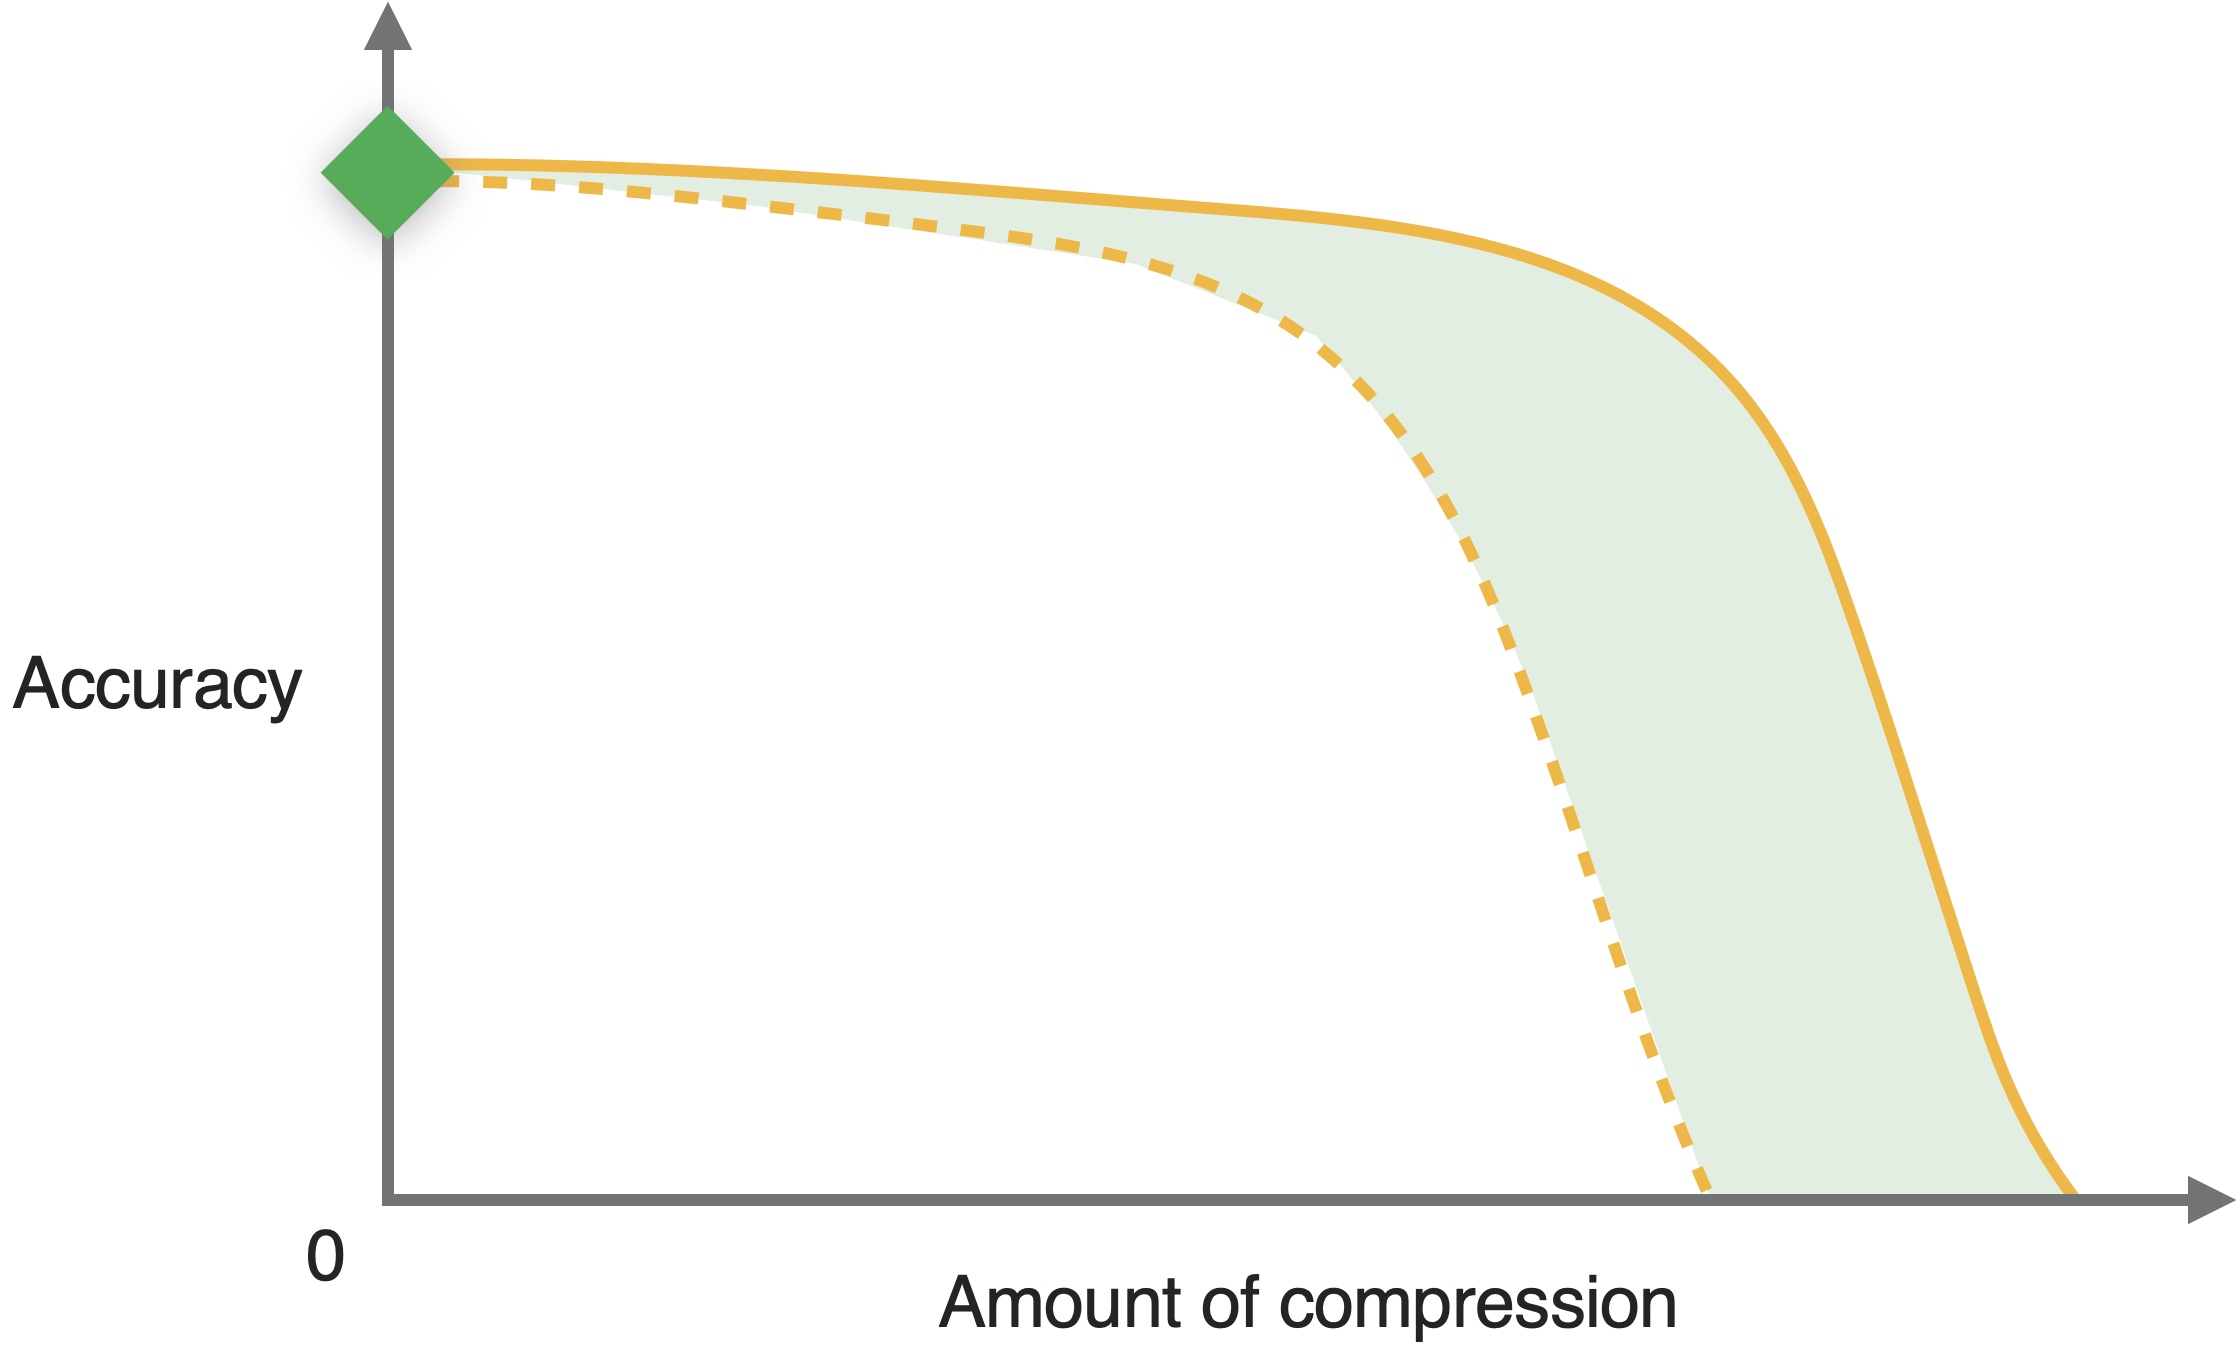
A hypothetical “accuracy-compression amount” trade-off curve. The dotted curve corresponds to data free compression, while the solid curve represents training time compression.#
How the APIs Work#
The ct.optimize.torch APIs provide model optimization algorithms for Pruning, Palettization, and Quantization Aware Training (QAT). The APIs accept a PyTorch module as input and return a transformed PyTorch module as output. Optimization is incorporated seamlessly into the training process so that you can use the transformed module in your training loop.
The transformations are accomplished either by wrapping the submodules with wrapper layers (as in the case of quantization-aware training), or by installing hooks on the submodules (for example, when mutating masks for parameter pruning). You can also combine these techniques.
For more information about using the APIs, see optimize.torch API overview.